
Imagine walking without discomfort or pain. That’s what properly applied Kinesiology Tape, or KT Tape, can do for your foot.
You might be wondering how this simple adhesive can bring such relief. Well, you’re about to discover the secrets behind KT Tape and its magic touch for foot issues. Whether you’re an athlete striving for peak performance or someone seeking relief from everyday foot pain, knowing how to KT Tape your foot can be a game-changer.
With easy-to-follow steps and expert tips, this guide will empower you to take control of your foot health. Ready to step into comfort? Let’s dive in!
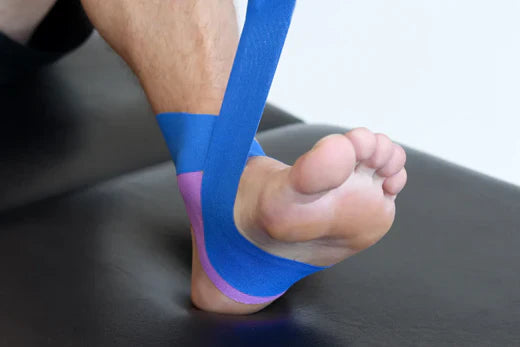
Credit: copperfitusa.com
Benefits Of Kt Taping
KT Tape supports foot muscles and relieves pain. It helps with injuries like plantar fasciitis and arch pain, improving movement and reducing discomfort.
Kinesiology Tape, commonly known as KT Tape, has gained popularity for its therapeutic benefits in treating various injuries, including foot pain. The elasticity and adhesive properties of KT Tape provide support and relief without restricting movement, making it a favored choice for athletes and individuals suffering from foot-related issues. But what makes KT Taping so beneficial? Let’s dive into the advantages of using this versatile tool.
Improved Blood Circulation
KT Tape works by gently lifting the skin, which can enhance blood circulation in the affected area. Improved circulation aids in reducing swelling and promotes faster healing. Imagine your foot feeling lighter and less stiff after a long day of standing or running.
Reduction Of Pain And Inflammation
One of the primary benefits of KT Taping is pain reduction. By supporting the muscles and tendons, it reduces pressure on the pain points, helping alleviate discomfort. This can be particularly helpful for those suffering from plantar fasciitis or heel spurs.
Enhanced Muscle Support
KT Tape provides support to muscles and joints without restricting movement. This can be especially beneficial during physical activities where your foot is under stress. It acts like a gentle brace, allowing you to continue your activities with confidence.
Prevention Of Injury
By supporting the foot’s structure, KT Tape can prevent strains and injuries. Whether you’re hiking, running, or just walking around the city, having that extra layer of support can make a significant difference in preventing overextension or accidental twists.
Confidence Boost
Knowing your foot is supported can boost your confidence in engaging in activities you might otherwise avoid. Whether it’s joining that dance class or going for a jog, KT Tape can give you peace of mind.
Customizable Application
You can tailor the application of KT Tape according to your specific needs. Whether you’re dealing with arch pain or toe discomfort, you can adjust the tape to target the exact area, making it a versatile solution. Have you ever tried KT Tape on your foot? How did it change your activity level and comfort? Share your thoughts and experiences!
Credit: kinesiologysportstape.com
Necessary Supplies
Gather KT tape, scissors, and clean water. Ensure your foot is dry and clean before application. Cutting the tape to the right length is crucial for effective support.
Preparing to tape your foot with Kinesiology Tape (KT Tape) can be a straightforward process, but having the right supplies on hand is crucial for effectiveness and comfort. Without the necessary tools, you might find yourself struggling to achieve the desired support or experiencing discomfort. Let’s delve into what you’ll need to ensure a successful taping experience.
Kt Tape
You’ll need a good quality KT Tape, which is specifically designed for athletic support and injury recovery. Choose a brand that offers elasticity and durability. A waterproof variant can be beneficial if you plan to engage in activities involving water.
Scissors
A pair of sharp scissors is essential for cutting the tape to the desired length. Dull scissors can make the edges of the tape jagged, which might cause peeling or discomfort. Keep them handy for quick adjustments.
Rubbing Alcohol Or Skin Prep Wipes
Clean skin is crucial for the tape to adhere properly. Use rubbing alcohol or skin prep wipes to remove any oils or lotions. This ensures maximum stickiness and prolongs the effectiveness of the tape.
Pre-wrap (optional)
If you have sensitive skin or are prone to allergic reactions, consider using a pre-wrap. This creates a barrier between your skin and the tape, reducing irritation while still allowing for support.
Towel
A small towel is helpful to dry your foot thoroughly before applying the tape. Moisture can prevent the tape from sticking properly, leading to a less effective application.
Measuring Tape
To ensure precision, use a measuring tape to cut the KT Tape to the correct length. This helps in achieving the ideal fit, maximizing the tape’s benefits. Having these supplies ready can make your taping process smoother and more efficient. Do you have everything you need to get started? Being prepared can make all the difference in your recovery journey.
Preparing The Foot
Clean the foot thoroughly before applying KT tape. Dry the skin completely to ensure proper adhesion. Trim any excess hair for better tape application.
Preparing your foot properly is crucial for effective KT taping. This process helps the tape adhere better and ensures maximum support. Follow these simple steps to get your foot ready for taping.
Cleansing The Skin
Start by cleaning the foot thoroughly. Use mild soap and water to remove dirt and oil. This step is important to ensure the tape sticks well. Rinse off all soap residue completely. Then, pat your foot dry with a clean towel.
Drying The Area
Once the foot is clean, focus on drying it properly. Moisture can weaken tape adhesion. Air dry your foot or use a towel until it’s completely dry. Ensure there are no damp spots left.
Trimming Excess Hair
Excess hair can affect tape sticking. Trim hair in the taping area if necessary. Use small scissors or an electric trimmer. Avoid shaving too close to the skin to prevent irritation. This step helps the tape bond securely.
Cutting The Tape
Preparing your KT Tape is a crucial step to ensure it adheres well to your foot and provides optimal support. The process may seem simple, but attention to detail can make a big difference. Let’s dive into the specifics of cutting the tape properly.
Measuring The Length
Getting the right length of tape is key to effective support. Measure the area of your foot that needs taping. This might be from the ball of your foot to your ankle or across the arch. Use a ruler or the tape itself to gauge the length needed.
Consider the movement and flexibility required for your activity. A longer piece may cover more area, but it should not restrict movement. Adjust the length based on your comfort and need.
Rounding The Edges
Rounding the edges of your tape prevents it from peeling off prematurely. Sharp corners can catch on socks or shoes, leading to frustration as the tape loosens.
With scissors, trim the corners of the tape into rounded shapes. This small step can significantly improve the tape’s longevity on your foot. It’s a quick fix that saves you from having to reapply the tape during your activities.
Have you ever faced a situation where the tape kept unraveling? Try rounding the edges next time and notice the difference it makes. Keeping it secure allows you to focus on your performance rather than tape adjustments.
Application Techniques
Kt Tape can help support a foot injury or relieve pain. Start by cleaning and drying the skin thoroughly. Cut and round the tape edges for better adhesion. Anchor the tape at the ball of the foot, gently stretching it towards the heel.
Ensure smooth application without wrinkles.
Applying KT Tape to your foot can offer significant relief from pain and support during physical activities. However, the application technique is crucial for it to be effective. Let’s dive into some essential steps to ensure you tape your foot correctly, allowing you to enjoy the benefits of KT Tape.
Anchor The Tape
Begin by cutting the tape to the desired length, ensuring you have enough to cover the affected area comfortably. Peel back about two inches of the backing at one end to create your anchor. This anchor should be applied with no stretch, securing it firmly just below your toes. The key to a good anchor is making sure it sticks well to clean, dry skin. Have you ever tried applying tape on sweaty skin? It just won’t hold!
Stretch And Apply
Once your anchor is in place, gently stretch the tape as you apply it along the arch of your foot. Aim for a stretch of about 50-75%, depending on how much support you need. Be mindful not to overstretch, as this can lead to discomfort or reduced effectiveness. The tape should feel snug but not restrictive. Think of it as providing a gentle lift rather than a tight squeeze.
Smooth Out Wrinkles
After application, run your fingers over the tape to smooth out any wrinkles or bubbles. This helps the tape adhere better and ensures even distribution of support. Wrinkles can cause discomfort and reduce the tape’s sticking power. Imagine walking with a pebble in your shoe—wrinkles can feel just like that! If you find any persistent wrinkles, gently lift that section of tape and reapply it smoothly. By following these techniques, you’ll enhance the tape’s effectiveness, ensuring you get the maximum benefit from your KT Tape application. How did these steps work for you? Share your experience or any tips you might have discovered!
Credit: www.tiktok.com
Taping For Common Issues
Taping can address many foot issues. It’s a simple, effective solution for discomfort and support. KT Tape provides relief and stability where it’s needed most. Below, explore how to tape for common foot problems.
Plantar Fasciitis
Plantar fasciitis causes heel pain due to inflammation. Taping reduces strain on the fascia. Start by cutting two strips of KT Tape. Place the first strip under the foot arch. Anchor it from the ball of the foot to the heel. Apply the second strip around the heel. This supports the fascia and alleviates pain.
Ankle Sprain
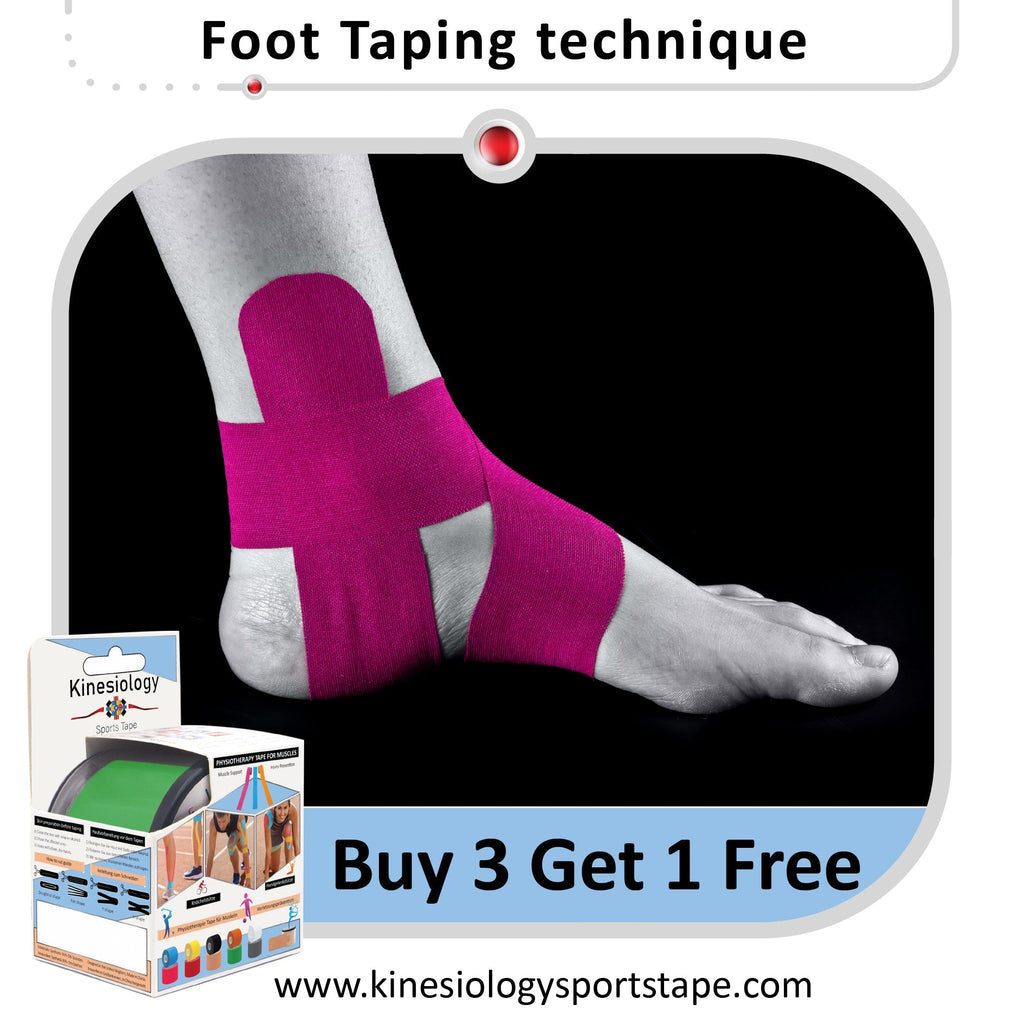
Ankle sprains occur due to sudden twists or turns. KT Tape provides stability and reduces swelling. Use one long strip and two short strips. Anchor the long strip on the inside ankle. Wrap it around the heel to the outer ankle. Secure with the short strips crossing the ankle for extra support.
Arch Support
Weak arches lead to discomfort and fatigue. Taping offers extra support and alignment. Use two strips of KT Tape. Start with the first strip under the foot arch. Anchor it from the big toe to the heel. Apply the second strip over the arch, crossing the first strip. This creates a supportive base.
Tips For Effective Use
Using KT tape on your foot can help with pain and injuries. Knowing how to apply it effectively is key for best results. Follow these tips to avoid common mistakes and ensure proper adhesion.
Avoiding Common Mistakes
- Clean the foot thoroughly before applying the tape.
- Do not stretch the tape too much.
- Avoid applying the tape directly on open wounds.
- Cut the tape into manageable pieces for easier handling.
- Check for skin sensitivity with a small piece first.
Ensuring Proper Adhesion
- Dry the skin completely before application.
- Warm the tape slightly for better sticking power.
- Press the tape gently onto the skin.
- Rub the tape edges to secure them.
- Wear socks to help the tape stay in place longer.
Aftercare And Maintenance
Proper aftercare ensures KT Tape stays effective on your foot. Keep the area dry and clean. Regularly check for wear or irritation to maintain comfort and support.
After applying KT Tape to your foot, proper aftercare is important. Good maintenance ensures the tape stays effective and your skin remains healthy. Following simple steps can prevent irritation and prolong the tape’s life.
Removing The Tape
Gently remove the tape to avoid hurting your skin. Start by loosening the edges with your fingers. Slowly peel back the tape in the direction of hair growth. Use warm water or oil to ease removal. This helps reduce pain and discomfort. Never rip the tape off quickly. This can damage your skin.
Skin Care Post-removal
After removing the tape, wash your foot with mild soap. Pat the area dry with a soft towel. Apply a moisturizing lotion to soothe the skin. Check for any redness or irritation. Give your skin time to breathe before reapplying tape. Keep the area clean to prevent infections.
When To Seek Professional Help
Knowing when to seek professional help is crucial in foot taping. While Kt tape can provide relief, some situations require expert attention. It’s important to recognize signs that indicate professional intervention is necessary for effective treatment and recovery.
Persistent Pain Despite Taping
If pain continues after taping, consult a healthcare professional. Lingering discomfort might signal an underlying issue. Professionals can diagnose and treat the root cause effectively.
Swelling And Redness
<pswelling a="" advice.="" and="" appropriate="" assess="" can="" care.
Difficulty Walking
<pwalking a="" be="" better="" can="" diagnosis="" doesn't="" if="" improve="" lead="" mobility,="" options.
Previous Foot Injuries
<ppast a="" can="" complicate="" consult="" doctor="" effectiveness.="" flare="" guidance="" history.
Uncertainty About Application
<punsure a="" about="" and="" application.="" can="" correct="" demonstrate="" ensures="" further="" injury.
Frequently Asked Questions
Does Taping Your Foot Help With Pain?
Taping your foot can help reduce pain by providing support and stability. It can also alleviate pressure and improve alignment. This method is especially useful for conditions like plantar fasciitis or sprains. Always consult a healthcare professional for proper taping techniques and advice tailored to your specific needs.
How To Tape For A Strained Foot?
Start by cleaning the foot and drying it thoroughly. Apply adhesive tape in a figure-eight pattern for support. Wrap from the ball of the foot to the arch, ensuring snugness without restricting movement. Finish with a final layer to secure.
Always consult a healthcare professional for proper guidance.
Do The Colors Of Kt Tape Mean Anything?
KT tape colors do not have any therapeutic significance. They are primarily for aesthetic purposes. Choose colors based on personal preference or style. The tape’s function remains the same regardless of color.
How To Tape A Foot For A Stress Fracture?
Clean the foot and apply padding to the affected area. Use athletic tape to wrap around the foot, starting from the toes towards the ankle. Ensure the tape is snug but not too tight to restrict circulation. Seek professional advice for proper treatment and guidance.
Conclusion
Mastering KT tape techniques can ease foot pain effectively. Practice ensures proper application. Keep tape clean for best results. Adjust tension for comfort and support. Seek help if pain persists. Foot care enhances mobility and life quality. KT tape offers a simple remedy.
Confidence grows with experience. Regular application supports healing. Remember, consult professionals for severe issues. Foot health matters. Enjoy active days without discomfort. KT tape supports your journey. Take steps towards better foot health today. Feel the difference. Embrace comfort. Keep moving forward with ease.