

Quick answer: To build your own golf clubs, you buy components (clubheads, shafts, ferrules, grips and epoxy), decide your specifications, prepare and cut the shafts, glue the heads on with two-part epoxy, let them cure, check length and swing weight, and install the grips. It takes basic tools, including a vise with a rubber shaft clamp, a tube cutter or abrasive saw, a gauge for length, and ideally a swing-weight scale. Building from components is a rewarding way to get clubs in exactly your specifications, but for complex lie and loft changes or premium heads, a professional club builder is safer. For ready-made customisable options, see the best custom golf clubs.
Building your own golf clubs is easier than many golfers think. Club assembly is mostly careful measuring, cutting and gluing, and thousands of hobbyists build their own sets. Doing it yourself lets you choose every component, learn how clubs work and make adjustments later. This guide walks through the components, tools and steps, highlights common mistakes and explains when to hand the job to a professional.
Is Building Your Own Clubs a Good Idea?
| Pros | Cons |
|---|---|
| Choose every component and spec | Requires tools and workspace |
| Learn how clubs work | Mistakes, such as cutting too short, cost money |
| Easy to adjust later | Lie and loft bending needs specialist equipment |
| Satisfying hobby | Branded heads may not be sold as components |
If you mainly want correctly fitted clubs, a fitting and a custom order from a brand may be simpler; see are custom golf clubs worth it. If you enjoy hands-on projects, building your own can be very rewarding.
Components You Need
| Component | What it is | Tips |
|---|---|---|
| Clubhead | The head, sold as a component | Check hosel bore size (parallel or taper tip) and recommended length |
| Shaft | Steel or graphite, in a chosen flex and weight | Match tip diameter to the hosel; note trimming instructions |
| Ferrule | Plastic trim ring above the hosel | Match to hosel and shaft diameter |
| Grip | Chosen model and size | Choose size to suit your hands |
| Epoxy | Two-part shafting epoxy | Use a golf-specific or high-shear epoxy |
| Grip tape and solvent | Double-sided tape and solvent to install grips | Extra wraps of tape increase grip size |
| Shafting beads or sand (optional) | Improve epoxy bond | Commonly mixed into epoxy |
Tools You Need
| Tool | Purpose |
|---|---|
| Vise with rubber shaft clamp | Holds the shaft securely without crushing it |
| Tube cutter (steel) or abrasive saw (graphite) | Cuts shafts cleanly to length |
| Abrasive cloth or tip-prep tool | Roughens the shaft tip so epoxy bonds |
| Length gauge or 48-inch ruler | Measures playing length correctly |
| Swing-weight scale (recommended) | Checks how heavy the head feels |
| Utility knife with hook blade | Removes old grips safely |
| Mixing sticks, cups and cleaning cloths | Epoxy prep and clean-up |
A quality vise is the foundation of a home workshop. The vise clamp regrip kit we feature in our guide to the best custom golf clubs has 4.8 stars from 233 ratings on the listing we checked and is well suited to grip work and simple assembly tasks.
Step 1: Decide Your Specifications
Before ordering parts, decide on length, lie, loft, shaft flex and weight, grip size and target swing weight. If you have been fitted, use those numbers. If not, start with standard lengths adjusted for your height; see what length golf clubs you need and how to measure golf club length. Write your specs down for every club.
Step 2: Check Component Compatibility
Make sure each shaft’s tip matches the head’s hosel. Irons use either taper-tip or parallel-tip shafts, and woods usually use parallel-tip graphite shafts of a specific diameter. Adjustable drivers also need the correct adapter sleeve. Check the shaft maker’s trimming chart, which tells you how much to trim from the tip for each club in a set.
Step 3: Tip-Trim the Shafts
Many shafts are designed to be trimmed from the tip by a set amount for each club to achieve the intended flex. Measure carefully from the tip, mark the shaft and cut with a tube cutter for steel or an abrasive saw for graphite. Never use a tube cutter on graphite, which can crack the fibres. Not every shaft needs tip trimming, so follow the manufacturer’s instructions.
Step 4: Prepare the Shaft Tip
Epoxy bonds best to a roughened surface. For steel shafts, abrade the tip area that will sit inside the hosel. For graphite shafts, remove the paint from that area without cutting into the fibres; a dedicated tip-prep tool or careful sanding works. Clean the tip and the inside of the hosel with a solvent to remove dust and oil.
Step 5: Install the Ferrule and Glue the Head
Slide the ferrule onto the shaft tip. Mix the two-part epoxy according to the instructions, adding shafting beads if you use them. Coat the shaft tip and the inside of the hosel, insert the shaft with a twisting motion and seat it fully. Push the ferrule down against the hosel, align any shaft graphics as you prefer and wipe away excess epoxy. Stand the club head-down to cure for the time stated on the epoxy, usually several hours to a full day.
Step 6: Cut to Length
Once the epoxy has cured, measure the playing length with the club in the playing position, using the standard method for your gauge. Remember that the grip cap adds a small amount of length, so allow for it before cutting the butt end. Cut a little long first if you are unsure, because you can always shorten a club but not lengthen it without an extension; see how to lengthen golf clubs.
Step 7: Check and Adjust Swing Weight
Swing weight describes how heavy the head feels during the swing. A swing-weight scale lets you check each club and match them through the set. If a club feels light, add a small amount of lead tape to the head or a tip weight inside the shaft before gripping. Lead tape such as this 2 g per inch golf lead tape makes small adjustments easy. Remember that grip weight also affects swing weight, so weigh the grip you plan to use.
Step 8: Install the Grips
Wrap double-sided grip tape along the butt section, adding extra layers for a larger grip. Apply grip solvent inside the grip and over the tape, slide the grip on quickly and align it square to the clubface. Let it set before playing. Our full walkthrough is in how to regrip golf clubs, and popular options such as Golf Pride MCC Plus4 grips are covered in the best golf club grips.
Step 9: Final Checks
- Confirm each club’s length and swing weight against your spec sheet.
- Check that every head is fully seated and the ferrule sits flush.
- Make sure grips are aligned and fully on.
- Hit a few gentle shots before full swings to confirm everything is secure.
Building vs. Reshafting vs. Regripping
| Project | Difficulty | Guide |
|---|---|---|
| Regripping | Easy | How to regrip golf clubs |
| Lengthening | Moderate | How to lengthen golf clubs |
| Reshafting | Moderate | How to reshaft a golf club |
| Full build from components | Moderate to advanced | This guide |
| Lie and loft bending | Advanced, specialist tools | Use a club builder |
Common Mistakes to Avoid
- Cutting too short: measure twice and allow for the grip cap.
- Poor tip preparation: heads can come loose if the epoxy cannot bond.
- Damaging graphite: never clamp graphite without a rubber shaft clamp or cut it with a tube cutter.
- Mismatched tips and hosels: check taper versus parallel and diameters before ordering.
- Rushing the cure: let epoxy fully cure before playing.
- Ignoring swing weight: clubs can feel inconsistent if weights vary widely.
Safety Tips
Wear eye protection when cutting shafts, work in a ventilated area when using solvents and epoxy, keep blades pointed away from your body when removing grips and follow the instructions on all products. If you use heat to remove an old head, do so carefully and never on a graphite shaft without proper technique, because excessive heat can damage the shaft and the hosel.
When to Use a Professional Club Builder
Some jobs are better left to professionals: bending lie and loft, which requires a calibrated machine; working with expensive premium heads; complex adjustable-driver builds; and frequency-matching shafts. A professional can also check your homemade builds. If you want clubs built to your exact specs without doing the work yourself, compare brands with build-to-order programmes in the best custom golf clubs, including PXG; see where PXG golf clubs are made.
How Much Does It Cost to Build Your Own Clubs?
Costs depend on the components you choose. Generic component heads and stock shafts can make a full set relatively affordable, while premium heads and shafts can match or exceed the price of a retail set. Tools are a one-time expense that pays off if you keep building or regripping. Budget for a few spare parts in case of mistakes when you start.
Getting Started: A Simple First Project
If you have never built a club, start small. Regripping a set teaches you how to use a vise, tape and solvent. Next, try reshafting a single wedge or an old iron, which covers tip preparation, epoxy and cutting to length. Once you are comfortable, build a single club from components, such as a wedge or hybrid, before attempting a full set. Each step builds confidence and keeps the cost of mistakes low.
Recommended Starter Kit
These three items cover the most common home club projects: holding clubs securely, fine-tuning swing weight and upgrading grips. Ratings refer to the listings we checked and can change.
Golf Club Vise Clamp Regrip Kit

Buyer feedback: 4.8 stars from 233 ratings. A CNC-machined aluminium vise with a quick-release mechanism that holds shafts securely for regripping and assembly work.
Golf Lead Tape (2 g per inch)
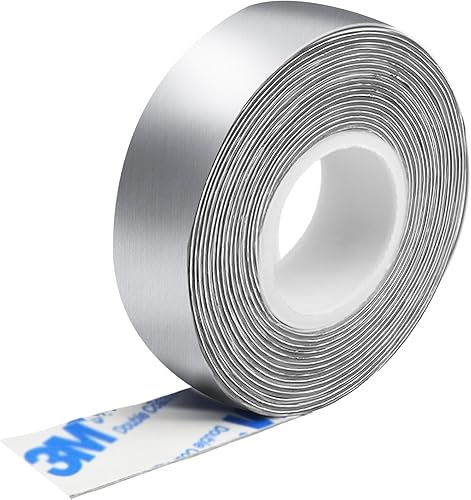
Buyer feedback: 4.7 stars from 781 ratings. Half-inch adhesive tape that adds about 2 grams per inch, ideal for matching swing weights after a build.
Golf Pride MCC Plus4 Grips (13-Pack)
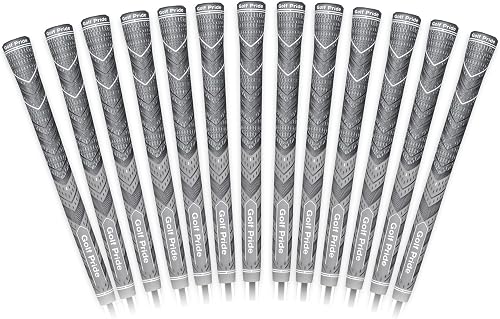
Buyer feedback: 4.8 stars from 2,414 ratings. Hybrid cord and rubber grips available in standard, midsize and jumbo sizes to finish a custom build.
Key Takeaways
- Building clubs is mostly careful measuring, cutting and gluing.
- Match shaft tips to hosels and follow the shaft maker’s trimming chart.
- Prepare tips properly and let epoxy fully cure.
- Check length and swing weight before gripping.
- Leave lie and loft bending to professionals.
Bottom Line
Building your own golf clubs lets you choose every component and specification, and with patience and the right tools it is well within reach of handy golfers. Start with simple projects, keep a spec sheet and seek professional help for lie and loft work. If you would rather buy clubs already built to your specifications, see our guide to the best custom golf clubs.
Frequently Asked Questions
Can you build your own golf clubs?
Yes. With components, two-part epoxy and basic tools such as a vise, shaft cutter and length gauge, golfers can assemble their own clubs.
What tools do you need to build golf clubs?
A vise with a rubber shaft clamp, a tube cutter for steel or an abrasive saw for graphite, abrasive cloth, a length gauge, a hook-blade knife, epoxy supplies and ideally a swing-weight scale.
Is it cheaper to build your own golf clubs?
It can be, especially with generic component heads and stock shafts, but premium components can cost as much as retail clubs.
How long does golf club epoxy take to cure?
It depends on the product, typically several hours to a full day. Follow the epoxy maker's instructions before playing.
Can I bend lie and loft at home?
Lie and loft bending requires a calibrated machine and experience, so it is best done by a professional club builder.
What is swing weight?
Swing weight describes how heavy the head feels during the swing. It is measured on a swing-weight scale and can be adjusted with lead tape or tip weights.