
Imagine cruising down an open road on your bike, feeling the breeze and the thrill of speed. But suddenly, discomfort sets in—your hands ache, your back is tense, and the ride is no longer enjoyable.
The culprit? Misadjusted handlebars. The position of your handlebars plays a crucial role in your comfort and performance on a road bike. If they’re not set just right, you could be sacrificing not only comfort but also efficiency and control.
Luckily, adjusting them is easier than you think. In this guide, we’ll walk you through the steps to perfectly adjust your handlebars, ensuring every ride is smooth and enjoyable. Get ready to transform your cycling experience and reclaim the joy of the ride. Keep reading to discover how a simple adjustment can make all the difference in your biking adventures.
Credit: www.cyclingweekly.com
Tools Needed
Allen keys, a torque wrench, and a ruler are essential tools. Ensure you have a bike stand for stability.
Adjusting the handlebars on your road bike isn’t just about comfort—it’s about performance and safety. But before you dive into the adjustment process, it’s essential to have the right tools at your disposal. Missing even a single tool can turn a simple task into a frustrating experience. Let’s make sure your toolbox is ready for action.Allen Wrenches
Allen wrenches, also known as hex keys, are vital for loosening and tightening bolts on your handlebars. Most road bikes require different sizes, so having a full set is beneficial. It’s like having the master key to unlock the potential of your bike’s setup.Torque Wrench
A torque wrench is crucial for ensuring bolts are tightened to the manufacturer’s specifications. Over-tightening can damage components, while under-tightening can lead to loose handlebars. It’s a small investment that pays off in peace of mind.Screwdrivers
While not always needed, screwdrivers can be useful for adjusting certain components on your bike, especially if your bike has integrated brakes or shifters. A flathead and Phillips are generally sufficient.Bike Stand
A bike stand makes the adjustment process easier and safer. It holds your bike steady, allowing you to focus on the task at hand. It’s like having an extra pair of hands to assist you.Lubricant
Lubricant ensures smooth operation of the moving parts. Applying a small amount to bolts can prevent rust and make future adjustments easier. Just remember, a little goes a long way. Are there any tools that you’ve found indispensable when working on your bike? Sometimes, the most unexpected tools become your best friends in the garage.Types Of Handlebars
Adjusting handlebars on a road bike enhances comfort and control. Choose between drop bars, flat bars, or riser bars. Each type offers unique benefits for different riding styles and preferences.
Road biking offers various handlebar types, each with unique benefits. Choosing the right handlebars can enhance your riding experience and comfort. Below are the common types of handlebars you might encounter on road bikes.Drop Bars
Drop bars are the most popular choice for road cyclists. They provide multiple hand positions. This is ideal for long rides. Riders can easily shift between gripping the tops, hoods, and drops. Drop bars offer aerodynamic advantages. They allow you to tuck in for speed. They are versatile and suitable for different terrains. Drop bars enhance control during descents and corners.Flat Bars
Flat bars are often seen on hybrid bikes. They provide a more upright position. This is great for comfort and visibility. Flat bars offer a wider grip. They improve stability and control. These handlebars are ideal for casual rides and commutes. They are easy to handle in urban settings. Flat bars allow better leverage when climbing hills.Aero Bars
Aero bars are designed for speed and efficiency. They are commonly used in time trials and triathlons. Aero bars allow riders to adopt a streamlined position. This reduces wind resistance significantly. They feature extensions for resting your forearms. Aero bars are perfect for flat and straight roads. Adjusting to aero bars might require practice. They can transform your cycling performance on race day.Assessing Your Current Setup
Assessing your current setup is crucial before diving into any adjustments on your road bike’s handlebars. Your bike should feel like an extension of your body, not a cumbersome piece of machinery. Reflecting on how your bike feels right now can reveal a lot about what needs tweaking.
Comfort Check
Are you experiencing numbness in your hands or neck strain during rides? These discomforts might indicate that your handlebars are not positioned optimally. A comfortable setup will allow you to ride longer distances without physical strain.
Consider the angle and height of your handlebars. If they feel too low or too far away, adjusting them might help alleviate pressure on your wrists and shoulders. Your bike should support your natural posture, encouraging a seamless riding experience.
Performance Evaluation
Your bike’s performance can be greatly impacted by handlebar positioning. Are you able to navigate corners with ease? Does your bike respond quickly to your steering inputs?
Assess whether your current setup allows you to maintain control and stability at various speeds. A well-adjusted handlebar setup will enhance your agility and responsiveness on the road. Evaluate your riding style and see if your current configuration complements it.
Consider experimenting with different positions during your next ride. Sometimes, a small tweak can make a noticeable difference in how your bike handles.
What other aspects of your riding experience could be improved by adjusting your handlebars? Taking the time to explore these questions can lead to a more enjoyable and efficient cycling journey.
Identifying Adjustment Needs
Assessing the position of your road bike handlebars is crucial for comfort and performance. Recognize discomfort signs like wrist strain or shoulder pain to determine adjustment needs. Properly aligned handlebars enhance your riding experience, ensuring a balanced posture and reducing fatigue on long rides.
Identifying the need for handlebar adjustments on your road bike is crucial for a comfortable and efficient ride. An improperly set handlebar can lead to discomfort, reduced performance, and even injury. By recognizing the signs that adjustments are necessary, you can enhance your biking experience significantly.Height Alteration
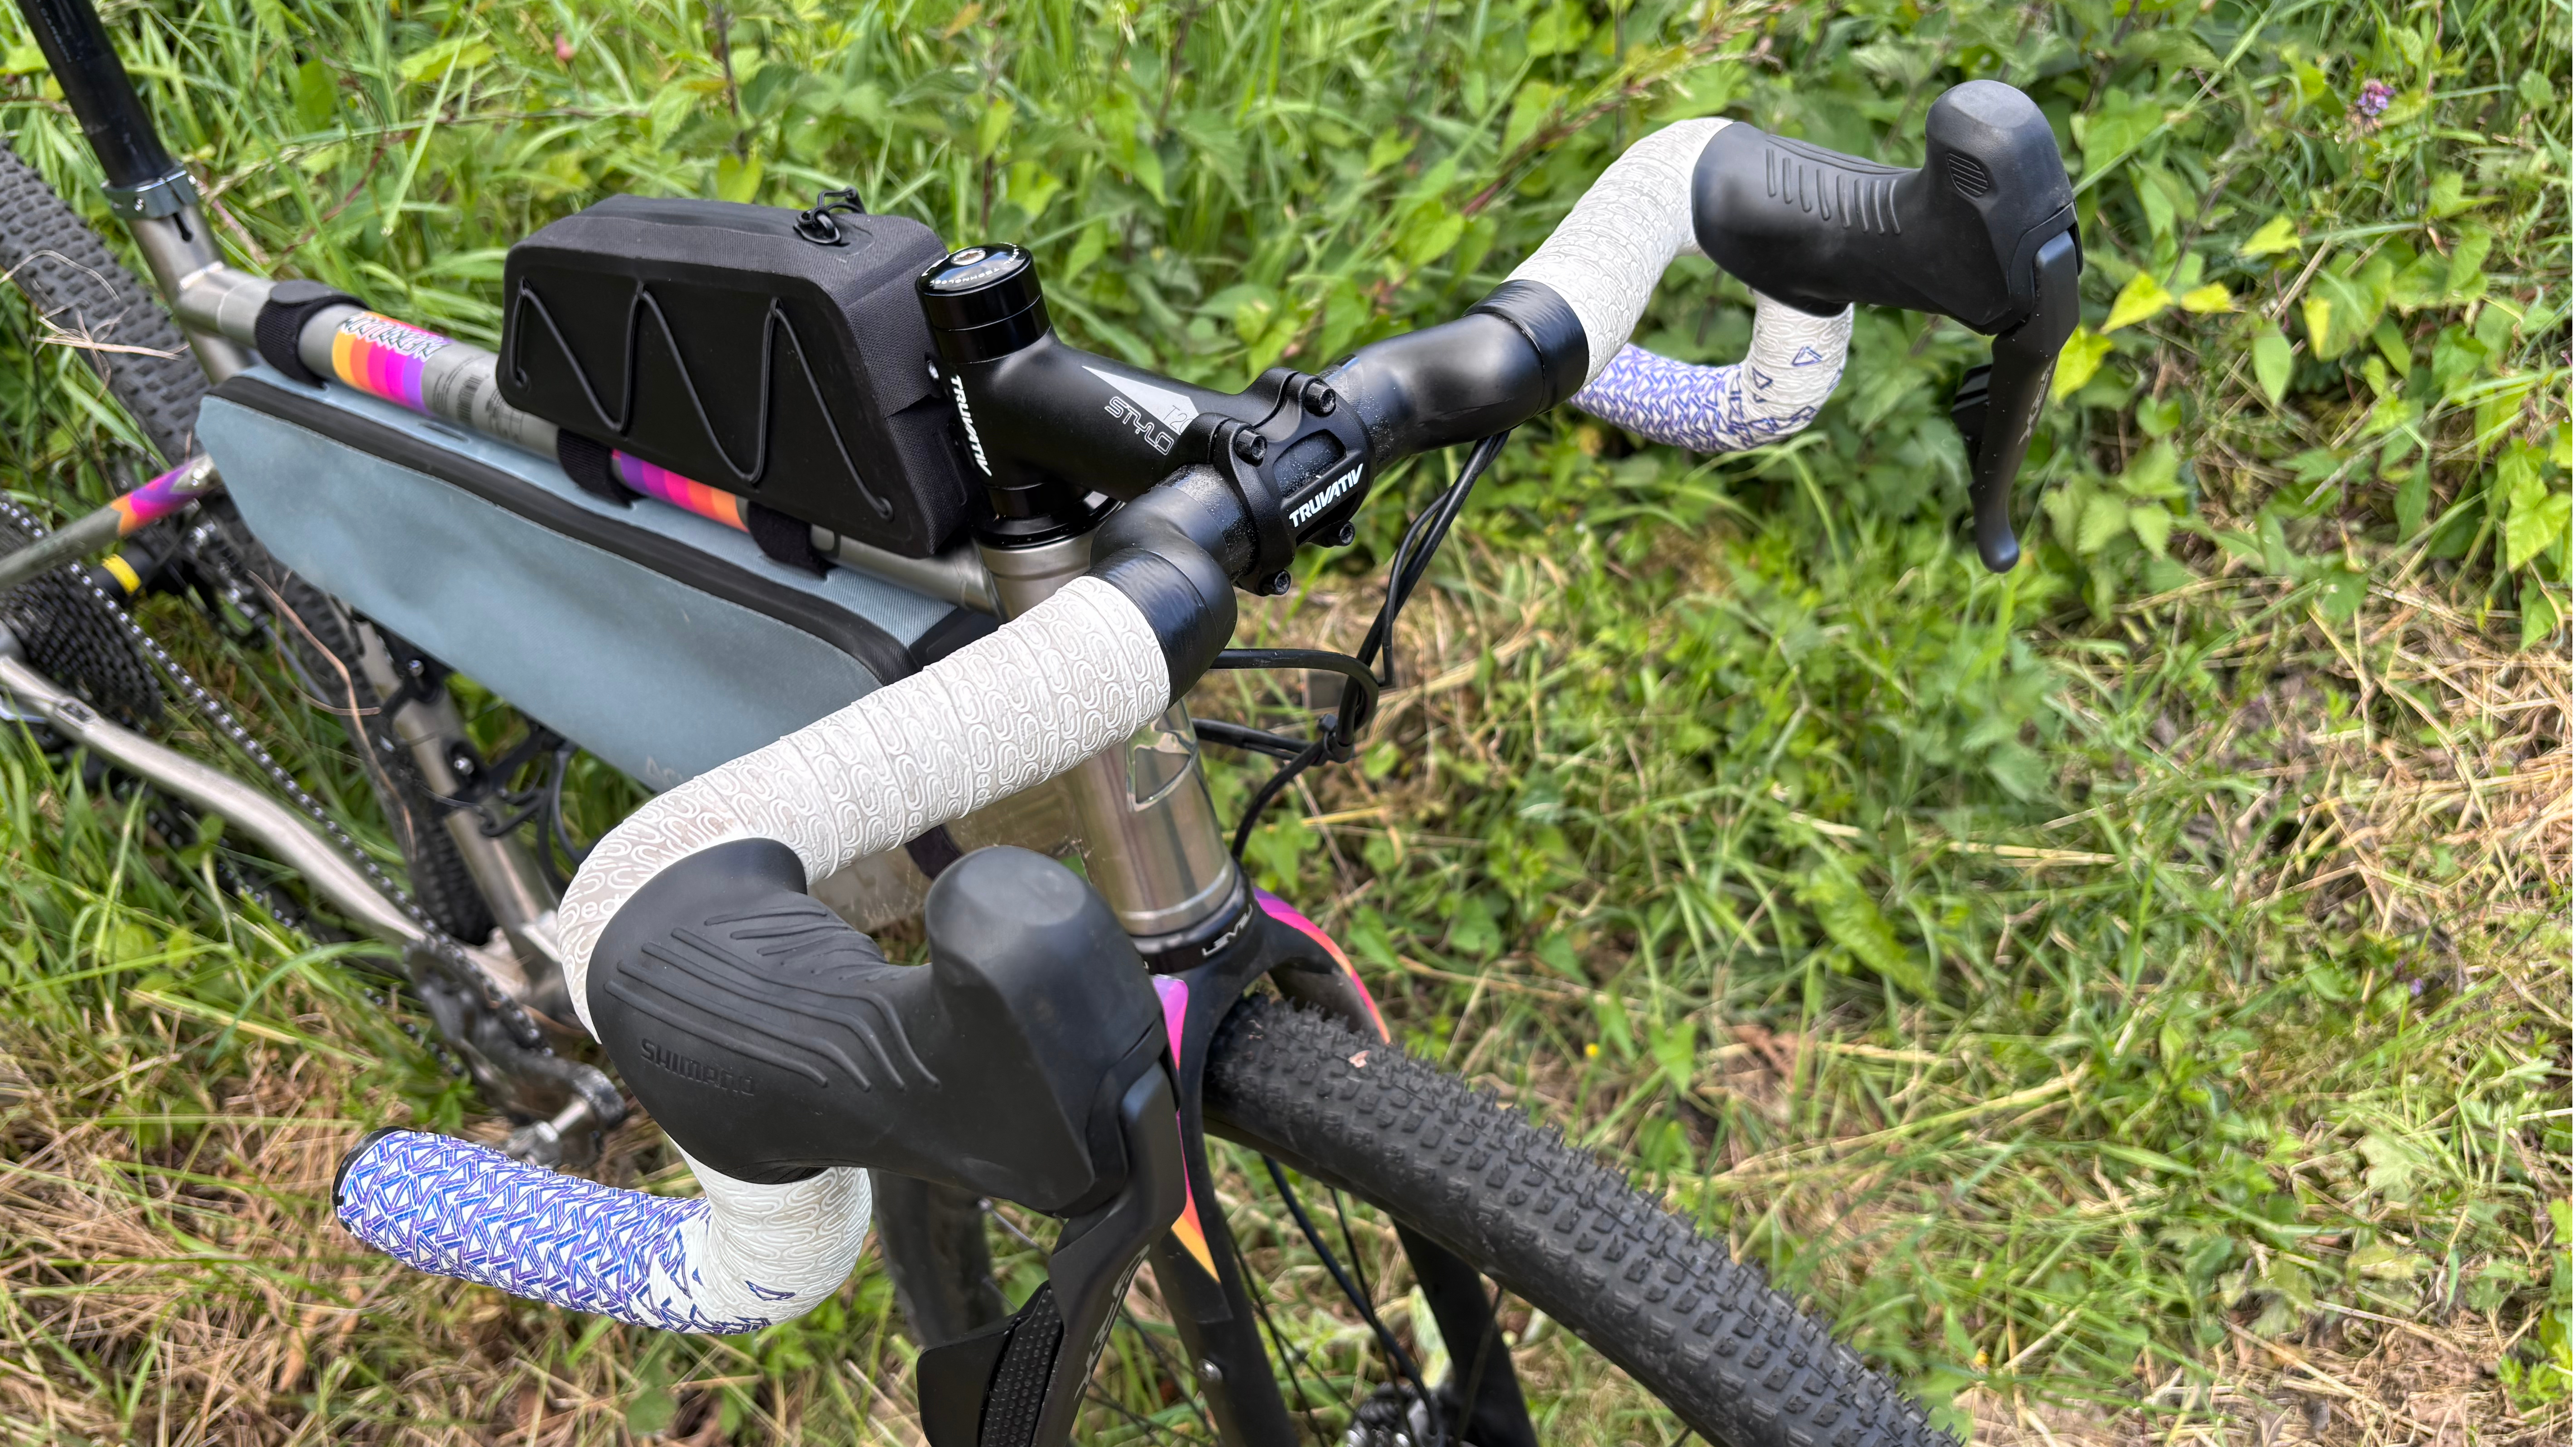
The height of your handlebars can greatly affect your riding comfort. If you find yourself experiencing back pain or excessive strain on your wrists, it might be time to adjust the height. Raise the handlebars to alleviate pressure on your lower back. Lowering them can help if you’re seeking a more aerodynamic position. Always ensure that your elbows are slightly bent and your weight is evenly distributed.Angle Modification
The angle of your handlebars can impact both comfort and control. If your hands frequently go numb or you struggle to maintain a grip, consider modifying the angle. Tilt the handlebars upward to create a more relaxed grip. If you need better access to brakes and gears, adjust them downward slightly. Remember, small changes can lead to significant improvements in comfort.Width Adjustment
Handlebar width is often overlooked but is vital for stability and control. If your shoulders feel cramped or overly stretched, you might need to adjust the width. Ensure the handlebars match the width of your shoulders for optimal support. Narrower bars can improve aerodynamics, while wider ones offer better control, especially during descents. Consider your riding style and preferences when making this adjustment. Do you feel any discomfort during your rides? Identifying these adjustment needs can transform your cycling experience, making it more enjoyable and less painful. Remember, small tweaks can lead to big changes in how you feel on your bike.Step-by-step Adjustment Process
Adjusting the handlebars on your road bike can enhance comfort and performance. This step-by-step guide will help you make the necessary adjustments with ease. Follow these instructions to ensure your bike is perfectly tuned to your needs.
Loosening The Stem
Start by loosening the bolts on the stem with an Allen wrench. Find the right size and turn counter-clockwise. This action will free the handlebars for adjustment. Ensure the bolts are loose but not completely removed. This prevents parts from falling apart.
Adjusting Handlebar Height
Raise or lower the handlebars to your desired height. This depends on your riding style and comfort. If you prefer an aggressive posture, lower the bars. For a relaxed position, raise them slightly. Ensure the height is comfortable for long rides.
Setting The Right Angle
Adjust the angle of the handlebars to suit your grip. Keep them level or slightly tilted upwards. This helps reduce wrist strain and improves control. Check the angle from a side view to ensure it’s even.
Securing The Handlebars
Tighten the stem bolts firmly to secure the handlebars. Use the Allen wrench and turn clockwise. Ensure all bolts are equally tightened to avoid misalignment. Test the handlebars for stability before riding.
Testing And Fine-tuning
Testing and fine-tuning handlebars on a road bike can enhance comfort and control. Adjust the height and angle to fit your riding style. Proper alignment reduces strain and improves aerodynamics.
Adjusting the handlebars on your road bike can significantly improve your riding experience. But achieving the perfect fit isn’t just about making initial adjustments. Testing and fine-tuning are crucial steps to ensure comfort and performance. Once you’ve made the initial adjustments, it’s time to hit the road and see how your changes feel in action.Ride Test
Take your bike out for a spin. This isn’t a casual ride—pay attention to how your body feels. Are you leaning too far forward? Is there too much pressure on your wrists? Keep these questions in mind. Make sure to ride on a familiar route. This way, you’re focusing on the adjustments and not navigating unfamiliar terrain. Notice if your handling has improved or if there’s any discomfort.Fine-tuning Adjustments
Once your ride test is complete, it’s time for fine-tuning. Did you notice any discomfort in your shoulders or neck? Try adjusting the handlebar height slightly. If your wrists felt strained, consider tilting the handlebars up or down. Small adjustments can make a big difference. It’s about finding that sweet spot where comfort meets control. Repeat this process until you feel at ease during your rides. Remember, the goal is to enhance your riding experience, making every journey enjoyable. Are there any other small tweaks that could improve your comfort and performance?Common Mistakes To Avoid
Adjusting the handlebars on a road bike can improve comfort and performance. Yet, many cyclists make mistakes during this process. Avoiding these errors ensures a safer and more enjoyable ride. Let’s explore some common mistakes you should avoid.
Over-tightening
Over-tightening can damage the bike’s components. It may lead to cracks or breaks in the handlebar or stem. Always use a torque wrench to apply the correct tension. Follow the manufacturer’s guidelines for torque specifications. This ensures the handlebars are secure without causing harm.
Incorrect Height
Setting the handlebars at an incorrect height can cause discomfort. It may lead to neck or back pain during long rides. Ensure the handlebars align with your riding style and comfort needs. For a relaxed posture, keep them level with the saddle. For a more aerodynamic position, lower them slightly. Always test the height adjustment before hitting the road.

Credit: alpkit.com
Maintenance Tips
Adjusting handlebars on a road bike enhances comfort and control. Loosen the stem bolts and align the handlebars with your riding position. Tighten the bolts securely, ensuring the handlebars are at the desired height and angle.
Adjusting the handlebars on your road bike is crucial for comfort and performance. However, the task doesn’t end with just the adjustment. Regular maintenance ensures your handlebars stay in top condition, providing a safe and enjoyable ride. Let’s dive into some essential maintenance tips to keep your handlebars—and your ride—smooth and hassle-free.Regular Checks
Conduct regular checks to ensure your handlebars are secure. A loose handlebar can compromise your control and safety. Make it a habit to inspect the tightness of the bolts. If you notice any wobbling, tighten them promptly using an Allen key. Check for any visible signs of wear or damage on the handlebars and stem. This proactive approach can prevent potential issues before they arise, keeping your ride safe and enjoyable.Cleaning And Lubrication
Cleaning and lubrication are vital in maintaining the functionality of your handlebars. Dirt and grime can accumulate, affecting the performance and lifespan of the components. Use a soft cloth and mild detergent to clean the handlebars regularly. After cleaning, apply a thin layer of lubricant to the moving parts to ensure smooth operation. Avoid using excessive amounts, as this can attract more dirt. Keeping your handlebars clean and lubricated is not just about maintenance; it enhances your riding experience. Imagine gliding down a hill with no creaks or resistance—pure cycling bliss! Do you remember the last time you checked your handlebars? Regular maintenance might seem trivial, but it can significantly impact your cycling experience. Keeping up with these simple tips can save you from unexpected hiccups and ensure that every ride is a joy.
Credit: www.theproscloset.com
Frequently Asked Questions
How Should Road Bike Handlebars Be Positioned?
Position road bike handlebars level with the saddle for comfort. Align them parallel to the ground. Ensure easy brake and gear accessibility. Adjust for a slight bend in elbows when riding. Test different positions for personal comfort and performance.
What Is The Correct Handlebar Height For A Road Bike?
Set the handlebar height level with the saddle for balanced comfort. Adjust slightly for personal preference and flexibility. Ensure arms are relaxed with a slight bend. Proper height improves control and reduces fatigue. Always fine-tune based on riding style and experience for optimal performance.
How To Tell If Handlebars Are Too High?
Check for wrist discomfort or strained shoulders during rides. Notice if steering feels awkward or less responsive. Observe if your posture is overly upright, causing back tension. Test if reaching the brakes and shifters is difficult. Ensure comfort and control to determine optimal handlebar height.
How Far Forward Should Bike Handlebars Be?
Handlebars should be positioned for comfort and control, typically aligning with the saddle or slightly forward. Adjust based on riding style and personal comfort. Correct alignment prevents discomfort and enhances performance. Always consider body posture and reach when positioning handlebars for optimal biking experience.
Conclusion
Adjusting your road bike handlebars can improve your ride comfort. Simple steps make a big difference. Start with loosening bolts and adjusting height. Then, test and tweak for the best fit. Don’t rush. Take your time to find the perfect position.
Your hands and back will thank you. Remember, small changes lead to big improvements. Always check your adjustments before each ride. Safety first, always. Enjoy the smoother ride and better control. Happy cycling and safe travels!