
Imagine waking up one morning, ready to conquer the day, only to find that your foot is in discomfort. Whether it’s a nagging pain from a recent run, a twist from an unexpected stumble, or an old injury that’s flaring up, foot pain can significantly impact your daily life.
The good news? There’s a simple solution you can try at home that might just change everything: taping your foot. In this guide, we’ll walk you through exactly how to tape your foot effectively. You don’t need to be a medical professional to master this technique.
With the right tape and a few easy steps, you can provide your foot with the support it needs to heal and thrive. Why let foot pain slow you down when there’s a practical and straightforward way to address it? Dive in, and discover how you can empower yourself to take control of your foot health today.
Choosing The Right Tape
Choosing the right tape for foot taping ensures comfort and support. Opt for athletic or kinesiology tape for flexibility and strength. Proper application prevents blisters and injuries, promoting a healthy foot.
Choosing the right tape is crucial for effective foot taping. The tape you select can impact support and comfort. With various options available, understanding their differences is key. This section will guide you in making an informed choice.Different Types Of Athletic Tape
Athletic tape comes in various forms. Each type serves a unique purpose.- Rigid Tape:Offers strong support and restricts movement.
- Elastic Tape:Provides flexibility and allows some motion.
- Kinesiology Tape:Supports muscles while allowing full range of motion.
Factors To Consider For Selection
Choosing the right tape involves several factors. Consider your specific needs and the activity level.- Purpose:Determine if you need support or flexibility.
- Material:Some tapes are cotton-based, others synthetic.
- Adhesive Strength:Strong adhesive is vital for rigorous activities.
- Skin Sensitivity:Opt for hypoallergenic tape if your skin is sensitive.
Preparing The Foot
Clean and dry the foot before taping to prevent slipping. Apply a pre-wrap to protect the skin from irritation. Start taping from the bottom, moving upwards, for firm support and flexibility.
Preparing your foot is a crucial step before applying tape. It ensures the tape adheres properly and serves its purpose effectively. Neglecting this preparation can lead to discomfort or even worsen the issue you’re trying to address.Cleaning And Drying The Skin
Start by washing your foot thoroughly with warm water and mild soap. This helps remove any dirt, sweat, or oils that might affect the tape’s adhesion. After washing, make sure to dry your foot completely. Use a clean towel to pat it dry, paying special attention to the spaces between your toes. Moisture can prevent the tape from sticking effectively, so take your time.Trimming Nails And Removing Hair
Trim your toenails short but not too close to the skin to avoid discomfort or cuts. Long nails can catch on the tape, causing it to peel off prematurely. Check for any excess hair on your foot. If necessary, carefully shave or trim the hair to create a smooth surface. This not only helps the tape stick better but also makes removal less painful. These simple steps can make a significant difference. Have you ever rushed through preparation and regretted it later? Taking a few extra minutes now can save you from discomfort and ensure your efforts pay off.Basic Taping Techniques
Taping a foot can support injuries and reduce pain. Clean the skin and apply adhesive spray. Place anchor strips around the foot. Use strips to support the arch and stabilize the ankle. Secure with additional tape for comfort and protection.
Basic taping techniques provide essential support to injured or weak feet. These techniques help in reducing pain and preventing further injury. Taping offers stability and improves foot function during movement. Here are some basic methods to get you started.Anchor Strips
Anchor strips are the foundation of foot taping. They hold everything in place. Begin by wrapping a strip around the foot’s arch. Ensure the tape is snug but not too tight. Place another strip around the heel for added stability. These strips act as a base for other taping methods. They provide a secure starting point.Stirrup Strips
Stirrup strips offer side-to-side support. Start by placing one end of the tape on the inside of the foot. Pull the tape under the arch and up the outer side. Secure it on the ankle. Repeat this process with another strip. Ensure overlapping for extra strength. Stirrup strips help in reducing lateral movement. They stabilize the foot during physical activities.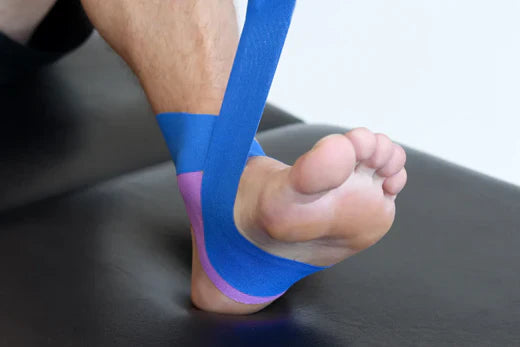
Credit: copperfitusa.com
Taping For Common Injuries
Taping the foot can help support injuries like sprains. Begin by wrapping tape around the arch, securing it snugly. Continue taping in a figure-eight pattern over the ankle and foot for added stability.
Taping for common injuries is a useful skill for athletes and active individuals. It helps support and protect the foot, speeding up recovery. Whether dealing with ankle sprains or plantar fasciitis, taping can provide relief and stability. Below, we explore how taping techniques can help with these common foot injuries.Ankle Sprains
Ankle sprains happen when ligaments stretch or tear. Taping offers crucial support. It limits movement, helping the ankle heal. Begin by wrapping the tape around the foot’s arch. Ensure it is snug but not tight. Then, bring the tape up around the ankle. Cross it over the front to form a figure-eight. This pattern stabilizes the joint. Check the tape for comfort and adjust if needed.Plantar Fasciitis
Plantar fasciitis causes heel pain due to inflammation. Taping can ease discomfort by supporting the arch. Start by applying the tape at the ball of the foot. Pull it back towards the heel. Wrap it under the arch, following its natural curve. Use another strip to anchor the first piece. Secure the tape around the foot’s sides. This technique reduces strain on the plantar fascia.Advanced Taping Methods
Advanced taping methods provide extra support for foot injuries. These techniques offer stability and comfort. They are perfect for athletes or active individuals. Knowing how to tape your foot can prevent further injuries. It also promotes healing. Here are two advanced taping methods to consider.
Heel Lock Technique
The heel lock technique offers great ankle support. It prevents excessive movement. Begin by anchoring the tape above the ankle. Wrap it around the heel. Make sure it forms a figure-eight pattern. This locks the heel in place. Repeat this pattern two to three times. Ensure each layer is snug but not too tight. This technique is ideal for sports activities.
Low-dye Taping
Low-Dye taping supports the arch and reduces pain. Start by placing the tape under the arch. Wrap it towards the back of the heel. Then, secure it at the ankle. Make sure the tape is smooth. Avoid wrinkles or folds. The tape should feel firm but comfortable. This method is beneficial for flat feet and plantar fasciitis. It helps maintain foot alignment.
Tips For Effective Taping
Ensuring correct foot taping involves choosing the right tape and applying it snugly but not too tight. Clean and dry the foot thoroughly to prevent slipping. Securely wrap the tape around the arch and heel to support movement and alleviate discomfort.
Taping the foot effectively can reduce pain and provide support. Whether for sports or daily activities, proper taping techniques are essential. Here are some tips to ensure effective foot taping.Ensuring Proper Tension
Maintain the right tension for comfort and support. Too tight, and it cuts circulation. Too loose, and it offers little help. Start with a gentle stretch, then adjust as needed. Test by moving your foot. It should feel supported yet free to move.Avoiding Common Mistakes
Avoid wrinkles in the tape. They can cause blisters and discomfort. Use smooth, even strokes when applying the tape. Ensure the skin is clean and dry. Moisture can make tape slip or not stick well. Trim any excess tape to prevent it from peeling. Always check for any irritation or redness after taping. Adjust or remove if discomfort occurs.Removing Tape Safely
Removing tape safely requires gentle peeling to avoid skin irritation. Warm water can help loosen adhesive for easier removal. Patience is key to prevent tearing or discomfort.
Removing tape from your foot might seem straightforward, but doing it safely is crucial to prevent skin irritation or damage. If you’ve ever hastily ripped off tape, you know the sting it can leave behind. A gentle approach not only protects your skin but also ensures you’re ready for your next taping session without any discomfort.Methods For Tape Removal
Start by soaking your foot in warm water for a few minutes. This helps to loosen the adhesive, making it easier to peel off. If you’re short on time, a little bit of oil—like olive or baby oil—can work wonders. Gently rub the oil around the edges of the tape until it starts to lift. Another effective method is using a hairdryer on a low heat setting to warm the tape. The heat softens the adhesive, allowing you to gently peel it off without pulling on your skin.Skin Care After Taping
Once the tape is removed, it’s time to pamper your skin. Rinse your foot with lukewarm water to wash away any remaining adhesive residue. Apply a moisturizing lotion or cream to soothe and hydrate the skin. This step is especially important if you have sensitive skin that tends to dry out easily. Check your skin for any signs of irritation or redness. If you notice any discomfort, give your skin a break before the next taping session. This ensures your foot stays healthy and ready for action. Have you ever noticed how your skin feels after removing tape? Taking these small steps can make a big difference in maintaining healthy skin.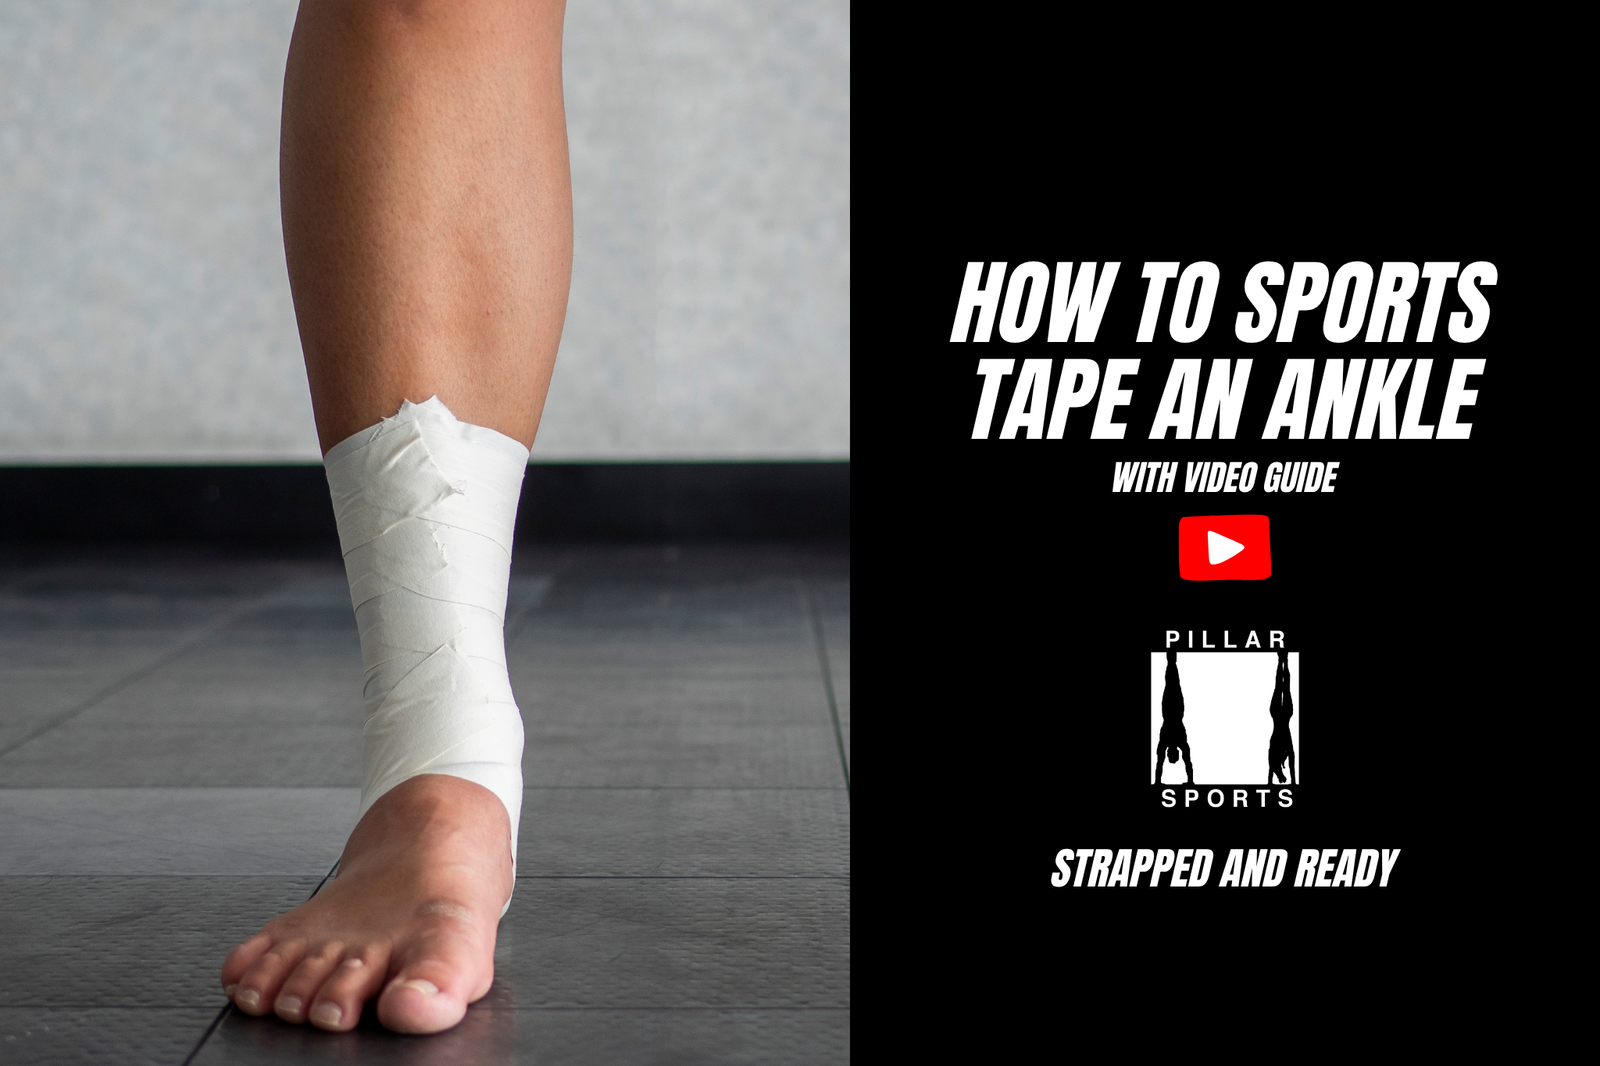
Credit: pillarsports.com
When To Seek Professional Help
Taping your foot can help with minor injuries or support. Sometimes, it is best to consult a professional. Recognizing the signs of improper taping is crucial. This ensures you get the right help when needed.
Signs Of Improper Taping
Improper taping can cause discomfort or worsen injuries. Look for these signs:
- Continuous pain or swelling after taping.
- Numbness or tingling in the foot.
- Skin irritation, redness, or blisters.
- Limited mobility or stiffness.
If you notice any of these signs, consider seeking professional help. Proper taping should relieve pain, not cause it.
Consulting A Sports Therapist
A sports therapist can provide expert advice on foot taping. They understand different taping techniques. They can evaluate your foot condition effectively. A therapist can guide you on the best taping method. This reduces the risk of further injury. They can also teach you how to tape your foot correctly.
Professional help ensures your foot heals properly. It also prevents future injuries. Seeking professional advice is a wise decision.

Credit: www.tiktok.com
Frequently Asked Questions
How To Tape Your Foot For Pain?
Clean and dry your foot. Use athletic tape to wrap the arch and heel, providing firm support. Ensure even pressure without restricting blood flow. Secure the tape, leaving toes free. This method helps alleviate pain by stabilizing foot movements. Always consult a healthcare professional for persistent pain.
What Does Taping Feet Do?
Taping feet provides support, reduces pain, and prevents injuries during physical activities. It improves stability and enhances performance. Proper application can alleviate discomfort and aid in recovery. Use specialized sports tape for best results.
Should I Tape My Foot If It Hurts?
Taping your foot can provide temporary support and relief for minor pain. Consult a healthcare professional for persistent issues.
Can You Tape Your Own Foot?
Yes, you can tape your own foot. Follow online guides for proper techniques. Use athletic or kinesiology tape. Ensure the foot is clean and dry before taping. Proper taping supports the foot, reduces pain, and prevents injury. Consult a professional for guidance if unsure.
Conclusion
Taping your foot can help with support and pain relief. Follow steps carefully to ensure effective application. Clean the foot before taping. Use good quality tape for best results. Practice makes perfect, so don’t worry if it’s tricky at first.
Soon, you’ll tape like a pro! Remember, everyone’s feet are different. Adjust the technique to suit your needs. Consult a doctor if pain persists. Proper foot care is essential. Keep feet happy and healthy. This can improve your daily comfort and activity level.
Try it today and feel the difference!