
Golf is a game of precision, skill, and strategy, but none of these qualities can be fully realized without a firm grip on your clubs. If you’ve ever felt your swing slipping or your shots veering off course, it might be time to consider changing your golf club grips.
Imagine the feeling of confidence and control as you line up your next shot, knowing your club won’t slip out of your hands. This is where the magic happens. By learning how to put grips on your golf clubs, you can transform your entire game.
In this guide, we’ll walk you through the simple steps to ensure your clubs feel like an extension of your body. You’ll discover how easy it is to improve your performance by making this one small change. Whether you’re a seasoned golfer looking to refresh your equipment or a beginner eager to start strong, this article has you covered. So, are you ready to take control of your game and make every swing count? Let’s dive in and get your grips right!
Materials Needed
Gripping golf clubs requires double-sided tape, solvent, a utility knife, and new grips. Ensure a clean workspace.
Putting new grips on your golf clubs can breathe new life into your game. It’s a simple way to improve your grip and control, but it all starts with having the right materials at hand. Without the proper tools, you’ll find the process much more challenging, and you may not achieve the best results. Let’s dive into the materials you’ll need to get the job done efficiently and effectively.Golf Grips
First, and most obviously, you’ll need the new grips themselves. Choose grips that suit your playing style and feel comfortable. There are various options, from rubber to corded, so select wisely based on your preference and weather conditions you usually play in.Grip Tape
Grip tape is essential for securing the new grip to the shaft of your club. Double-sided grip tape works best. It ensures a snug fit and prevents any slipping during your swing.Solvent
A solvent helps the grip slide onto the shaft with ease. You can use commercial grip solvent or household items like mineral spirits. This makes the process smoother and allows the grip to set properly.Utility Knife
A sharp utility knife is needed to remove the old grip. Opt for one with a hook blade to make the removal safer and more efficient. Be cautious while using it to avoid any damage to the shaft.Vice And Rubber Shaft Clamp
Using a vice with a rubber shaft clamp can make the task easier by holding the club steady. This setup prevents the club from moving as you work, ensuring a clean and straight grip application.Rags Or Towels
Keep some old rags or towels handy to clean off any excess solvent or debris. They are also useful for wiping down the club after removing the old grip and during the installation process.Bucket Or Tray
A bucket or tray is useful to catch any excess solvent that drips off during the process. This helps keep your workspace clean and prevents any mess. Having all these materials ready before you start makes the process straightforward. Have you ever tried replacing grips without one of these items? It can turn a simple task into a frustrating experience. By gathering these essentials, you’re setting yourself up for success.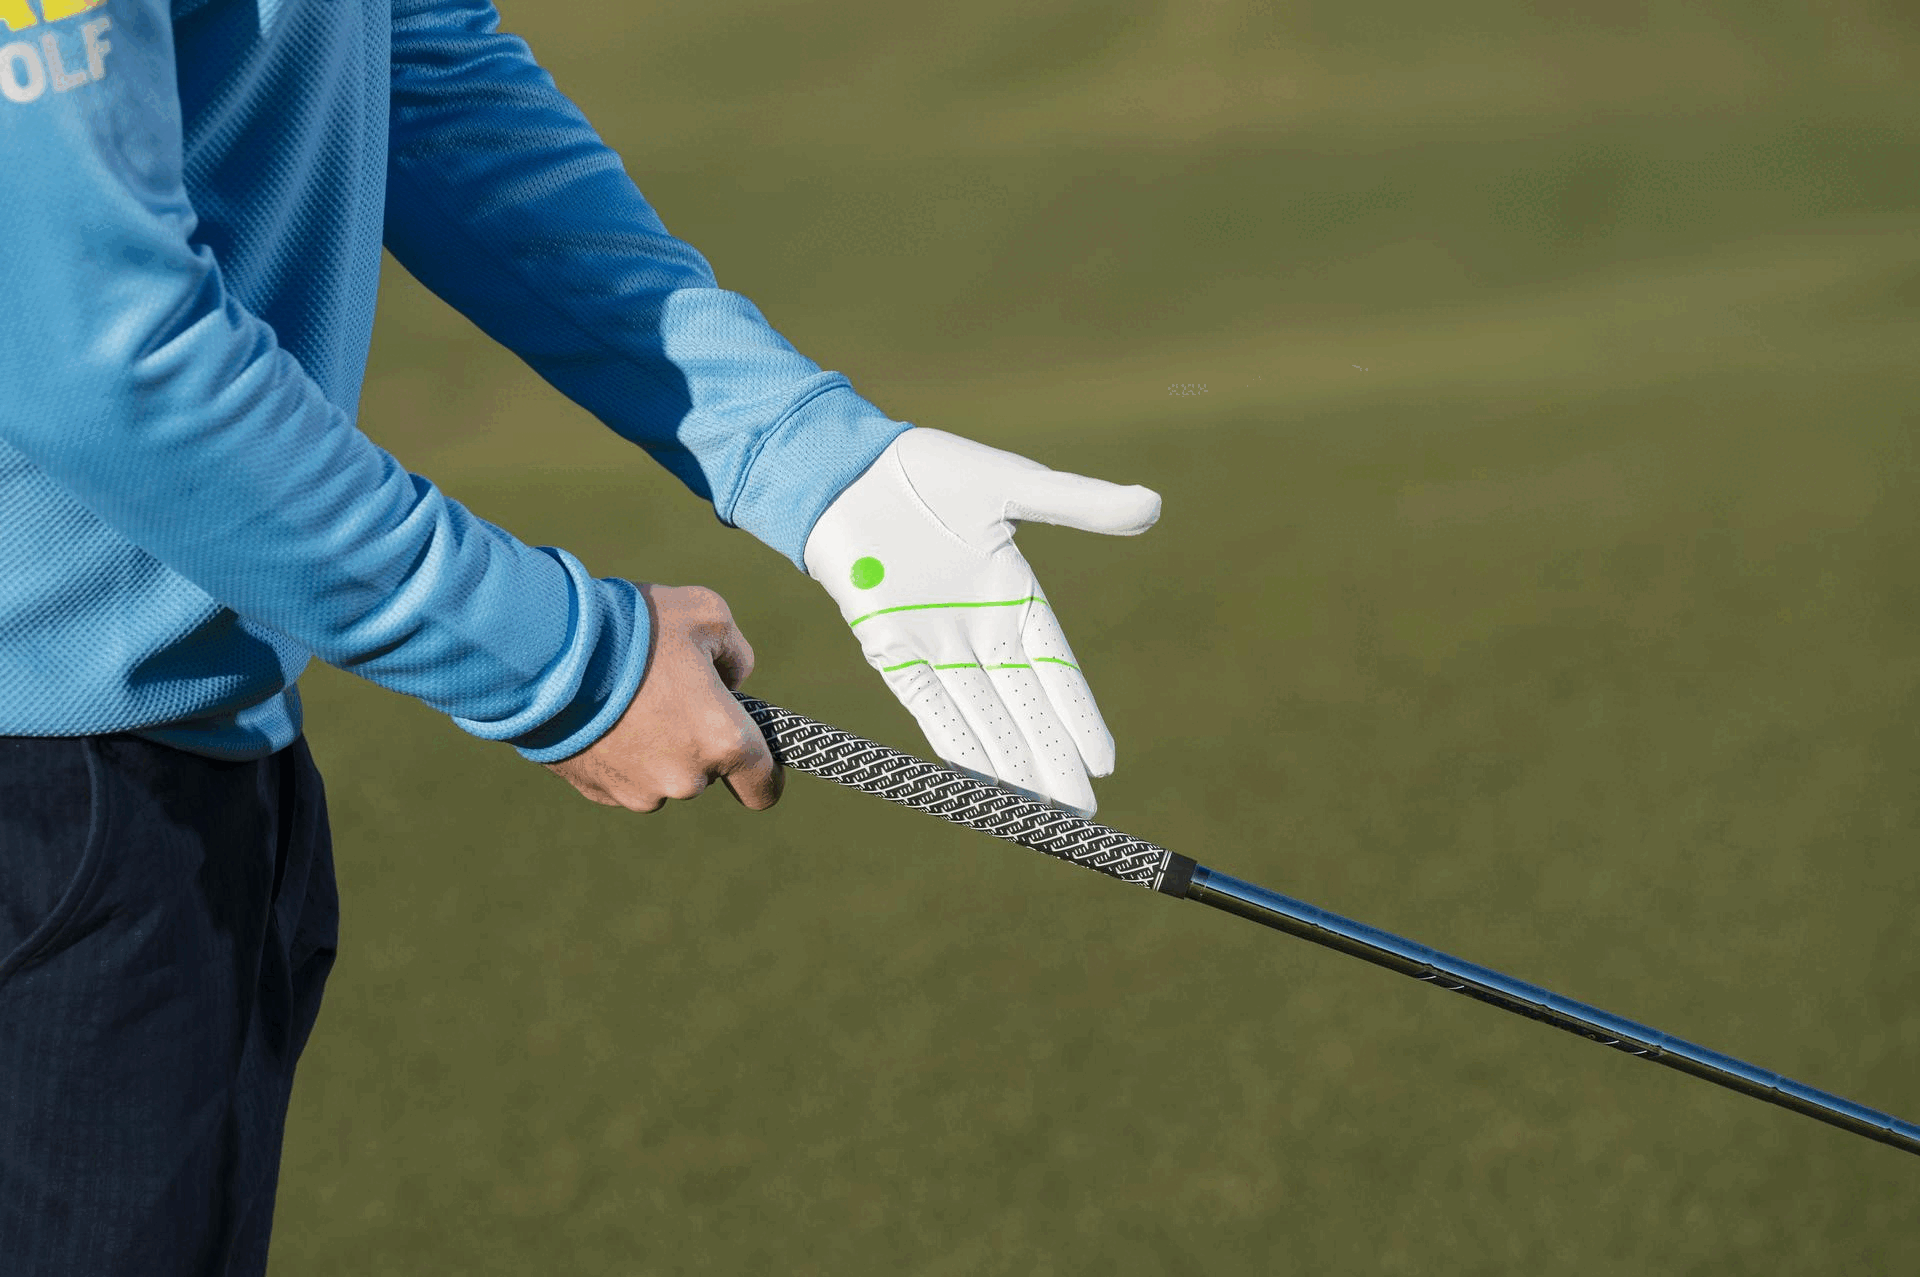
Credit: www.golfmonthly.com
Preparation Steps
Ensure the workspace is clean and well-lit. Gather necessary tools like a utility knife and grip tape. Secure the club firmly before removing the old grip, then carefully apply the new grip for optimal performance.
Putting new grips on your golf clubs can dramatically improve your game, but it’s crucial to start with proper preparation. This process involves removing old grips and cleaning the shaft meticulously. Each step is pivotal to ensure the new grips adhere well and last longer. Let’s explore these preparation steps in detail.Removing Old Grips
Begin by securing the club in a vice with a protective rubber insert. This keeps the club stable without damaging it. Use a utility knife to cut the old grip lengthwise. Exercise caution to avoid scratching the shaft, especially if it’s graphite. Peel off the old grip and discard it. Sometimes, a grip removal tool can make this task easier.Cleaning The Shaft
Once the old grip is removed, inspect the shaft for leftover adhesive. A clean surface is essential for the new grip to stick properly. Use a solvent like grip solvent or mineral spirits to wipe away any adhesive residue. A cloth or rag works well for this task. Dry the shaft thoroughly. A clean, dry surface ensures the new grip adheres securely and evenly. Is there a particular challenge you face during this process? Consider these tips as a guide to perfecting your grip replacement technique.Applying New Grips
Applying new grips to golf clubs enhances control and comfort. Remove the old grip, apply grip tape, and slide on the new one. Ensure it is aligned properly for the best performance on the course.
Applying new grips to your golf clubs can breathe new life into your game. Whether you’re swapping out worn grips or just want to try something fresh, the process is straightforward but requires a bit of care. With the right materials and techniques, you’ll be back on the course with improved control and comfort in no time.Cutting The Tape
The first step in applying new grips is to cut the double-sided grip tape to the appropriate length. Usually, a piece slightly longer than the grip itself works best. Use a sharp utility knife or scissors to avoid fraying the tape edges. Wrap the tape smoothly around the shaft, ensuring it covers the area where the new grip will sit. Overlapping tape can lead to uneven grips, so be precise.Applying Grip Solvent
Once your tape is secure, it’s time to apply the grip solvent. This is crucial for allowing the grip to slide on easily. Pour the solvent generously over the taped area, letting it coat evenly. You might be tempted to skip this step, but doing so could make the grip difficult to apply. Ensure some solvent also goes inside the grip itself, which will help it slide on without resistance.Sliding On The Grip
Now comes the satisfying part: sliding the new grip onto your club. Align the grip’s logo with the clubface for a professional look. Position the open end of the grip at the end of the shaft and push it steadily downwards. You might need to twist slightly to get it over the tape, but be careful not to tear the grip. Check the alignment once more before the solvent dries. It’s your last chance to make adjustments without damaging the grip. Have you ever struggled with misaligned grips and wondered if a slight twist could have improved your swing? This is your moment to get it right. By taking these careful steps, you’ll ensure your grips are secure and ready for action. Enjoy the enhanced feel and precision on your next round!Final Adjustments
Final adjustments ensure a perfect fit for your golf club grips. Align the grip carefully, checking for symmetry and balance. Secure the grip tightly, making sure it feels comfortable and stable in your hands.
Final adjustments are crucial in ensuring your golf clubs are ready for that perfect swing. You’ve chosen the right grips and applied them, but the last touches make all the difference. Pay close attention to these steps to ensure everything is just right.Aligning The Grip
Alignment is critical for a consistent game. Stand with your club in a playing position, looking down the shaft towards the grip. Align the grip so that the logo or alignment aid points directly at your target line. Twist the grip slightly if needed, but be quick—solvent dries fast! Doing this ensures your grip feels natural and enhances your control.Removing Excess Solvent
Excess solvent can create a slippery situation. Use a clean, dry cloth to wipe off any remaining solvent from the grip and shaft. Allow the club to dry completely. This typically takes about 24 hours, but it’s worth the wait for a secure grip. What happens if you skip these final adjustments? Your game might suffer from misaligned grips or slippery handles. Take the time to perfect these steps, and you’ll likely notice an improvement in your performance.Tips For Success
Enhance your golf game by learning how to properly put grips on clubs. Start by gathering necessary tools like solvent and tape. Ensure the club is clean before applying the new grip for optimal performance.
Putting grips on your golf clubs can greatly improve your game, giving you more control and comfort during each swing. But to get the most out of your new grips, it’s essential to follow some key tips for success. By paying attention to details, you can ensure a perfect installation and prolong the life of your grips.Choosing The Right Grip
Selecting the right grip for your clubs is crucial. Consider the material—rubber, synthetic, or leather—all offer different feels and durability. Rubber grips, for instance, are great for absorbing shock and can be ideal if you play in rainy conditions. Think about the size of the grip. A grip that’s too small or too large can affect your swing path. For example, a larger grip might help reduce a hook in your shot, giving you straighter swings. Texture is another aspect to consider. If your hands sweat a lot, a grip with a rougher texture can provide better traction and prevent slipping. It’s all about finding what feels right in your hands.Maintaining Your Grips
Once you’ve installed your grips, regular maintenance can extend their life. Clean your grips frequently to remove dirt and sweat. A simple wipe with a damp cloth can do wonders. Check for signs of wear and tear. Cracks or shiny spots indicate it’s time for a replacement. You don’t want a worn grip to compromise your game. Consider rotating your grips between rounds. This helps in evenly distributing wear and prolongs their lifespan. Have you ever noticed how a fresh grip feels so much better? Regular maintenance can keep them feeling that way for longer. By focusing on these tips, you ensure your grips not only feel great but also perform well, enhancing your overall golfing experience. What adjustments will you make to your grip routine today?
Credit: m.youtube.com
Common Mistakes
Failing to clean the club shaft can lead to poor grip adhesion. Incorrectly aligning the grip often results in discomfort during swings. Using too much solvent might cause the grip to slide off, while too little makes installation difficult.
Putting grips on golf clubs can be tricky for beginners. Many mistakes are common during the process, which can affect your game. Knowing these can help you avoid errors and save time.Incorrect Tape Application
Tape must be applied smoothly on the shaft. Wrinkles or bubbles cause uneven grip feel. Ensure the tape covers the full area without gaps. Gaps lead to grip slipping during a swing. Use even pressure while applying tape for a consistent layer.Using Too Much Solvent
Solvent helps slide the grip onto the shaft. Using excess can cause issues. It might make the grip loose or damage the tape. Use a small amount to coat the tape evenly. This ensures the grip stays firm and secure. Always let the solvent dry before using the club.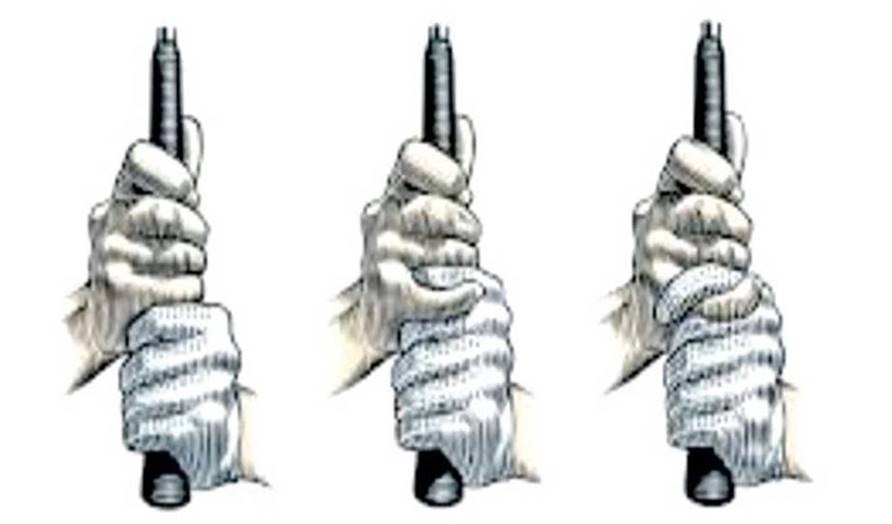
Credit: www.ballflightacademy.com
Frequently Asked Questions
How Do You Put New Grips On Golf Clubs?
Remove old grips using a utility knife. Clean the shaft thoroughly. Apply double-sided tape, leaving a gap at the end. Add grip solvent inside the new grip, then slide it onto the shaft. Align correctly and let it dry for at least 24 hours.
Enjoy improved performance with new grips!
Can I Regrip My Own Golf Clubs?
Yes, you can regrip your own golf clubs. Start by removing the old grips. Clean the shaft thoroughly. Apply grip tape and solvent. Slide the new grip on, ensuring it’s aligned properly. Allow it to dry for a few hours before use.
Follow these steps for a successful regripping process.
How To Put On A Golf Grip For Beginners?
Begin by applying grip solvent to the inside of the grip and over the tape. Slide the grip onto the shaft quickly. Adjust for alignment before solvent dries. Ensure the grip is securely attached and aligned correctly. Allow it to dry for at least 24 hours before use.
How To Correctly Grip Your Golf Club?
Grip the club with your lead hand, fingers first. Place the thumb along the shaft. Wrap your trail hand around, overlapping or interlocking fingers. Ensure palms face each other. Maintain a light grip pressure for better control. Practice consistently for improved accuracy and swing.
Conclusion
Putting grips on golf clubs is easy with practice. Start by gathering the right tools. Make sure the work area is clean. Remove old grips carefully. Clean the club thoroughly. Apply grip tape smoothly. Use solvent for easy sliding. Push the new grip in place.
Check the alignment. Let it dry completely. Enjoy your improved grip on the course. Proper grips can enhance your swing. Feel more control and comfort. Have fun golfing with friends. Remember, practice makes perfect. Keep learning and improving your skills.
Happy golfing!