
Have you ever found yourself struggling to store your kayaks efficiently? You’re not alone.
Many outdoor enthusiasts face the challenge of keeping their kayaks safe and organized. Imagine a simple solution that not only saves space but also extends the life of your beloved watercraft. Building a rack for your kayaks might be the answer you’ve been searching for.
This guide will walk you through the process, helping you create a sturdy and practical rack tailored to your needs. Whether you’re a DIY pro or a beginner, you’ll find the steps easy to follow. By the end, you’ll have a reliable storage solution that keeps your kayaks secure and ready for the next adventure. Ready to dive in and transform your storage woes into wins? Let’s get started!

Credit: www.familyhandyman.com
Materials Needed
Wooden beams, steel brackets, and waterproof screws are essential for constructing a sturdy kayak rack. Sandpaper and weather-resistant paint ensure durability, while measuring tape and a saw facilitate precise cuts. Safety gear like gloves and goggles are crucial for protection during the building process.
Building a kayak rack can be a rewarding DIY project, allowing you to store your kayaks efficiently and safely. The first step to any successful project is gathering the right materials. With the right supplies, your kayak rack will be sturdy, long-lasting, and perfectly suited to your space and needs. Here’s what you’ll need to get started:Wood
Choosing the right type of wood is crucial for durability. Opt for pressure-treated lumber or cedar, as these are resistant to moisture and weather conditions. Ensure the wood is straight and free from cracks or knots, as these can weaken your structure over time.Metal Brackets
Metal brackets provide added support and stability. You can find these at your local hardware store. Look for galvanized or stainless steel options to prevent rust and corrosion, especially if your rack will be outdoors.Screws And Nails
You’ll need a variety of screws and nails to assemble your rack. Make sure they’re appropriate for outdoor use if your rack will be exposed to the elements. Using screws instead of nails in key areas can provide extra strength and security.Drill And Drill Bits
A reliable drill is essential for assembling your rack. Having a set of drill bits in different sizes ensures you can handle all the fastening tasks required. If you don’t own a drill, consider borrowing one from a friend or renting from a local tool rental service.Measuring Tape
Precision is key in any DIY project. A measuring tape helps ensure your cuts are accurate and your rack is built to the correct dimensions. Double-checking your measurements can save you time and frustration later.Sandpaper
Smooth out rough edges with sandpaper to prevent splinters and improve the overall finish of your rack. Choose a medium-grit paper for initial sanding and a finer grit for a polished look.Paint Or Sealant
Protect your rack from the elements with a quality paint or sealant. If you’re placing your rack outside, this step is crucial for longevity. Opt for a product that’s designed for outdoor wood to maximize protection. Are you ready to start your DIY adventure? With these materials in hand, you’re well on your way to crafting a custom kayak rack that suits your needs perfectly.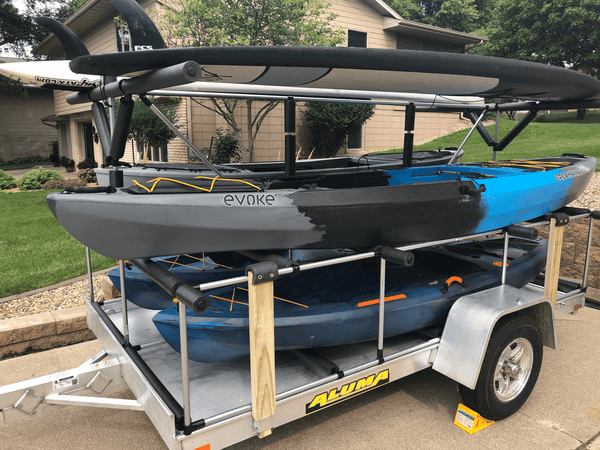
Credit: makerpipe.com
Choosing The Right Location
Selecting an ideal spot is crucial for building a kayak rack. Consider accessibility and stability to ensure safety and convenience. Ensure the location is dry and sheltered to protect the kayaks from weather damage.
Choosing the right location for your kayak rack is crucial. A well-chosen spot ensures easy access and protects your kayaks. Consider several factors before deciding on the perfect location.Accessibility
Make sure the location is easy to reach. You want to avoid obstacles or tight spaces. Check if the area allows smooth movement when carrying the kayaks.Protection From Elements
The rack should shield kayaks from harsh weather. Strong sun and heavy rain can damage them. Look for a spot with natural protection, like under a tree or beside a building.Proximity To Water
Close proximity to water saves time and energy. Transporting kayaks over long distances is tiring. Aim for a location near your usual launching point.Ground Stability
Ensure the ground is stable and even. Unstable ground can cause the rack to tilt or fall. A flat surface provides a safe foundation for your kayaks.Security
Choose a secure location to prevent theft. The area should be visible and well-lit. Consider installing security measures if needed.Space Availability
Verify there’s enough space for the rack and kayaks. Crowded areas can lead to damage. Make sure there’s ample room for access and storage.Designing The Rack Structure
Building a rack for kayaks involves crafting a sturdy and accessible storage space. Ensure the frame supports the weight and shape of your kayaks. Use durable materials to enhance longevity and prevent damage.
Designing the rack structure for your kayaks is both a creative and practical endeavor. You want a design that’s sturdy and functional, yet tailored to your specific needs. Whether you have a single kayak or a fleet, the right design ensures your kayaks are stored safely and conveniently.Understanding Your Space And Needs
Before diving into construction, evaluate the space where you’ll install the rack. Measure the dimensions carefully. Think about how many kayaks you need to store and their sizes. Do you have a garage, backyard, or a dedicated storage shed? Your space will dictate the rack’s design and materials.Choosing The Right Materials
Select materials that can withstand the elements if your rack will be outdoors. Wood is a popular choice for its natural appearance and ease of use. Pressure-treated lumber resists rot and decay. Alternatively, metal provides durability and a sleek look. Consider the weight of your kayaks when choosing materials to ensure the rack remains stable.Deciding On The Rack Style
There are various styles to consider, such as wall-mounted, freestanding, or ceiling racks. A wall-mounted rack saves floor space and is ideal for smaller areas. Freestanding racks offer flexibility and can be moved if needed. Ceiling racks maximize vertical space, keeping kayaks out of the way. Reflect on how often you’ll access your kayaks to choose the most convenient style.Ensuring Stability And Safety
Safety should be your top priority. Ensure the rack is securely anchored if wall-mounted. Use brackets or straps to prevent kayaks from slipping or falling. Test the stability by gently rocking the rack once assembled. A rack that wobbles poses a risk to both your kayaks and anyone nearby.Incorporating Custom Features
Think about adding features that enhance functionality. Hooks can hold paddles, life jackets, or other gear. Consider padding for added protection against scratches and dents. Custom features make your rack not just a storage solution, but a personalized kayak station. Does your current setup reflect your kayaking habits? Designing a rack tailored to your needs transforms storage into an extension of your passion for kayaking.Cutting And Preparing Wood
Selecting the right wood ensures a sturdy kayak rack. Measure and cut pieces precisely for a perfect fit. Sand edges smoothly to prevent splinters and enhance durability.
Cutting and preparing wood is a crucial step when building a rack for kayaks. It’s where your planning transforms into tangible progress. With the right tools and techniques, you can ensure your kayak rack is sturdy and reliable.Selecting The Right Wood
Choosing the right type of wood is the foundation of your project. Opt for durable, weather-resistant wood like cedar or treated pine. These options withstand the elements, ensuring your rack lasts for years.Gathering Essential Tools
Before you start cutting, gather essential tools to streamline the process. A circular saw is great for precise cuts, while a jigsaw can handle more intricate angles. Don’t forget safety gear like goggles and gloves to protect yourself.Measuring And Marking
Accurate measurements are the backbone of a well-built rack. Use a tape measure and pencil to mark your cuts clearly on the wood. Double-check each measurement to avoid costly mistakes.Executing Clean Cuts
Cutting wood requires a steady hand and focus. Ensure your saw blade is sharp for clean cuts. Apply consistent pressure and let the saw do the work, guiding it steadily along your marked lines.Sanding For Smoothness
After cutting, sanding is essential for a smooth finish. Use sandpaper to smooth out any rough edges or splinters. This step not only improves aesthetics but also ensures safety when handling the rack.Pre-drilling Holes
To prevent wood from splitting, pre-drill holes before assembly. Use a drill bit slightly smaller than your screws. This simple step can save you from structural weaknesses later on.Personal Tip: Test And Adjust
Once your pieces are cut, assemble them temporarily to test the fit. This allows you to make any necessary adjustments before final assembly. Remember, a little patience here can lead to a perfect fit later. How do you ensure precision in your DIY projects? Share your tips and tricks in the comments below!Assembling The Frame
Build the kayak rack frame using sturdy materials. Ensure the frame’s width accommodates kayak sizes. Secure joints with screws for stability.
Assembling the frame of a kayak rack is a crucial step. A strong frame ensures your kayaks stay secure. It also makes loading and unloading easier. Begin with quality materials for durability. Follow these steps to create a reliable frame.Selecting The Right Materials
Choose sturdy materials like treated wood or metal. These resist weather and wear. Ensure the materials can handle the weight of your kayaks.Cutting And Measuring Components
Measure twice, cut once for accuracy. Use a tape measure to mark your cuts. Ensure all pieces are the correct length.Assembling The Base
Lay out your base pieces on a flat surface. Align them correctly before attaching. Use screws or bolts for a secure fit.Building The Vertical Supports
Attach vertical supports to the base. These hold the kayaks in place. Ensure they are evenly spaced for balance.Securing The Crossbars
Position crossbars between the supports. They cradle the kayaks. Secure them tightly to prevent wobbling.Checking Stability And Balance
Test the frame for stability. Ensure it doesn’t wobble or tip. Adjust as needed for a solid structure.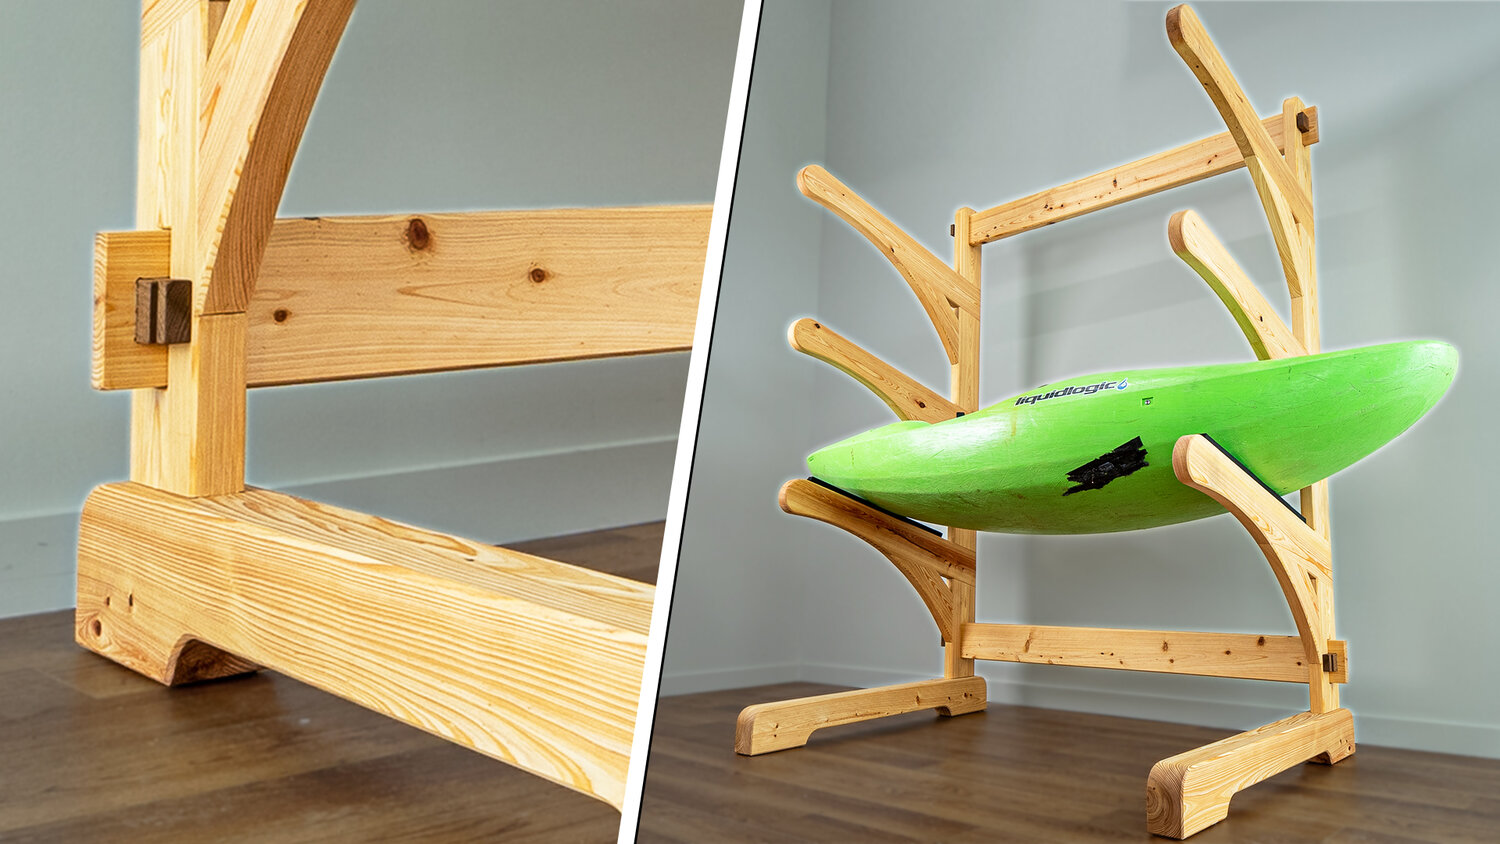
Credit: craftedworkshop.com
Installing Support Brackets
Building a rack for kayaks is a rewarding project. One key step is installing support brackets. These brackets ensure your kayak stays secure. Proper installation guarantees the stability of your rack.
Choosing The Right Brackets
Pick brackets strong enough to hold the kayak’s weight. Look for rust-resistant materials. Consider the kayak’s size and shape when selecting.
Marking The Installation Points
Use a measuring tape to mark bracket spots. Ensure equal spacing for balance. Double-check measurements before drilling.
Drilling Holes For Brackets
Drill holes at marked points. Use a drill bit that matches the bracket screws. Ensure holes are straight for a secure fit.
Securing The Brackets
Align brackets with the drilled holes. Insert screws and tighten them. Make sure brackets are firmly attached.
Testing The Bracket Strength
Apply pressure to check bracket stability. Ensure they can support the kayak’s weight. Adjust any loose brackets for safety.
Securing The Rack To Ground
Securing the rack to the ground is essential for stability. Use concrete anchors to firmly attach the base. Ensure the rack is level and secure, providing safe storage for your kayaks.
Securing your kayak rack to the ground is a crucial step in ensuring that your beloved watercraft stays safe and stable, especially during adverse weather conditions. Without a solid foundation, even the sturdiest rack can topple over, causing potential damage to your kayaks and other property. As you embark on this step of your DIY project, consider the following strategies to anchor your rack effectively.Choosing The Right Anchors
Selecting the right type of anchors is essential for a secure hold. Concrete anchors are ideal if your rack will be placed on a concrete surface, offering firm resistance against movement. For grassy or dirt surfaces, ground anchors can provide the necessary grip to keep the rack stable.Installation Process For Concrete Surfaces
Drilling into concrete might sound daunting, but with the right tools, it’s straightforward. Use a hammer drill to create holes that match the size of your chosen anchors. Once the holes are drilled, insert the anchors and tighten them securely to ensure that the rack is firmly attached to the ground.Installing Ground Anchors On Soft Surfaces
Soft surfaces require a different approach. Use a metal rod or auger to create a hole for the ground anchor. Insert the anchor and twist it into the earth until the top is flush with the ground. This method ensures that your rack remains stable even when the ground is soft or wet.Regular Maintenance Checks
Once your rack is secured, it’s important to perform regular checks to ensure everything stays in place. Inspect the anchors for signs of rust or loosening, especially after storms or strong winds. Keeping a vigilant eye can prevent potential mishaps and extend the life of your rack.Personal Tip: Diy Experience
From personal experience, securing my kayak rack to the ground was the most rewarding part of the project. It not only gave me peace of mind but also a sense of accomplishment. Have you ever tackled a project that seemed daunting but turned out to be simpler than expected?Adding Protective Padding
Protective padding prevents scratches on your kayaks when storing them. Use foam or rubber for safe cushioning. Secure the padding with straps to ensure stability during storage.
Adding protective padding to your kayak rack is crucial to prevent scratches and dents on your beloved watercraft. Padding serves as a cushion that absorbs shocks during transportation, ensuring your kayak remains in pristine condition. Let’s delve into how you can effectively add protective padding to your kayak rack.Choosing The Right Material
Selecting the right padding material is the first step. Opt for foam or rubber padding, which are both durable and provide excellent shock absorption. Consider using pool noodles, which are cost-effective and easy to cut to the desired length.Securing The Padding To The Rack
Once you’ve chosen your material, it’s time to secure it. Use zip ties or heavy-duty adhesive to attach the padding firmly to the rack. Make sure it covers all potential contact points where the kayak touches the rack.Ensuring Adequate Coverage
Check that all parts of your kayak that make contact with the rack are cushioned. Pay special attention to sharp edges and corners of the rack. Even a small unpadded area can lead to damage over time.Testing The Setup
Before hitting the road, give your setup a test. Gently place your kayak on the rack and ensure it sits comfortably on the padding. Shake the rack slightly to verify that the kayak remains secure and cushioned.Maintaining The Padding
Inspect the padding regularly for wear and tear. Replace any worn-out sections to maintain optimal protection. Keeping the padding in good condition will extend the life of both your rack and kayak. Have you ever noticed small scratches on your kayak after a trip? Adding protective padding could be the simple solution you’ve been overlooking. By taking these steps, you’ll ensure every journey leaves your kayak as pristine as the last.Testing Stability
Building a stable kayak rack ensures safe storage. Use sturdy materials and precise measurements for balance. Secure the structure firmly to prevent tipping.
Testing the stability of your kayak rack is crucial. A stable rack ensures safety and protects your investment. It prevents your kayak from falling or getting damaged. Before loading your kayak, confirm the rack can support the weight. Testing stability is a simple yet essential step in the building process.Check The Rack’s Balance
First, examine the balance of your rack. Ensure it stands firmly on the ground. Push gently from different angles to see if it wobbles. A stable rack should not tilt or sway.Evaluate Weight Distribution
Place equal weight on each side of the rack. Use weights similar to your kayak’s weight. Observe how the rack holds up. If one side dips, adjust the support.Inspect The Fastenings
Look at all screws and bolts. Tighten any that seem loose. A well-fastened rack will be more stable. Check for any signs of rust or wear.Simulate Wind And Movement
Mimic the effect of wind by gently shaking the rack. Notice how it reacts to the motion. A strong rack should stay in place under light pressure.Test With A Kayak
Finally, place your kayak on the rack. Observe the rack’s behavior. Ensure the kayak sits securely without tipping. This will confirm the rack’s stability. Each of these steps ensures your kayak rack is ready and safe for use. A stable rack gives peace of mind and protects your gear.Maintenance Tips
Building a kayak rack requires sturdy materials and a simple design. Ensure proper spacing to avoid damage. Regularly check for rust and tighten loose bolts for safety.
Maintaining your kayak rack ensures it stays in top condition. Regular maintenance also extends its lifespan. Proper care keeps your kayaks safe and secure. Below are some useful maintenance tips. These tips help keep your rack in peak condition.Inspect Regularly
Check your rack for any signs of wear or damage. Look for rust, loose bolts, or cracks. Ensure all parts are secure and functioning well. Regular inspections prevent bigger problems.Clean Thoroughly
Dirt and debris can accumulate on your rack. Clean it regularly with water and mild soap. Rinse and dry it properly to avoid rust. A clean rack lasts longer.Check Fasteners
Fasteners keep your rack secure. Tighten any loose bolts or screws. Replace any that are rusty or worn out. This ensures your kayaks are held safely.Protect Against Rust
Rust can weaken your rack. Apply a rust-resistant spray or paint. Keep it dry and out of damp conditions. This helps maintain its strength and durability.Store Properly
Store your rack in a dry, sheltered place when not in use. This protects it from harsh weather. A well-stored rack stays in good condition longer.Apply Lubricant
Lubricate moving parts to prevent them from seizing. Use a good quality lubricant on hinges or locks. This ensures smooth operation. Keep these tips in mind for your kayak rack’s longevity. Regular maintenance is key.Frequently Asked Questions
Is It Better To Store A Kayak Vertically Or Horizontally?
Store kayaks horizontally to prevent deformation. Use padded supports or straps for even weight distribution. Avoid vertical storage to minimize stress on the hull. Keep the kayak in a dry, shaded area to protect it from UV damage. Regularly inspect for wear and ensure proper ventilation to prevent mold.
How Far Apart Should Roof Racks Be For A Kayak?
Place roof racks about 24 to 36 inches apart for a kayak. This ensures stability and safety during transport. Proper spacing prevents the kayak from shifting while driving. Always check your vehicle’s roof rack guidelines for specific recommendations. Adjust according to kayak size and shape for optimal fit.
How To Transport A Kayak With No Roof Rack?
Use foam blocks or pool noodles to cushion the kayak on your car’s roof. Secure it with strong straps running through the doors, avoiding windows. Ensure the kayak is centered and tightly fastened. Drive cautiously, checking stability frequently to prevent shifting during transport.
How Wide Should A Kayak Rack Be?
A kayak rack should ideally be 24 to 36 inches wide. This width ensures stability and accommodates most kayak sizes. Measure your kayak’s width and choose a rack accordingly to ensure a secure fit. Adjustability in the rack can offer more flexibility for different kayak sizes.
Conclusion
Building a kayak rack can be a simple task. It saves space and protects your kayaks. Follow the steps closely for best results. Use sturdy materials for durability. Measure twice before cutting anything. Consider your storage location carefully. Ensure easy access to your kayaks.
Safety is key when lifting and storing. Personalize your rack to fit your style. Enjoy organized storage and peace of mind. Your kayaks deserve a safe home. Keep them ready for your next adventure. With your new rack, kayaking becomes even more enjoyable.
Happy paddling!